Simple Ways to Keep Your Home’s Air Fresh

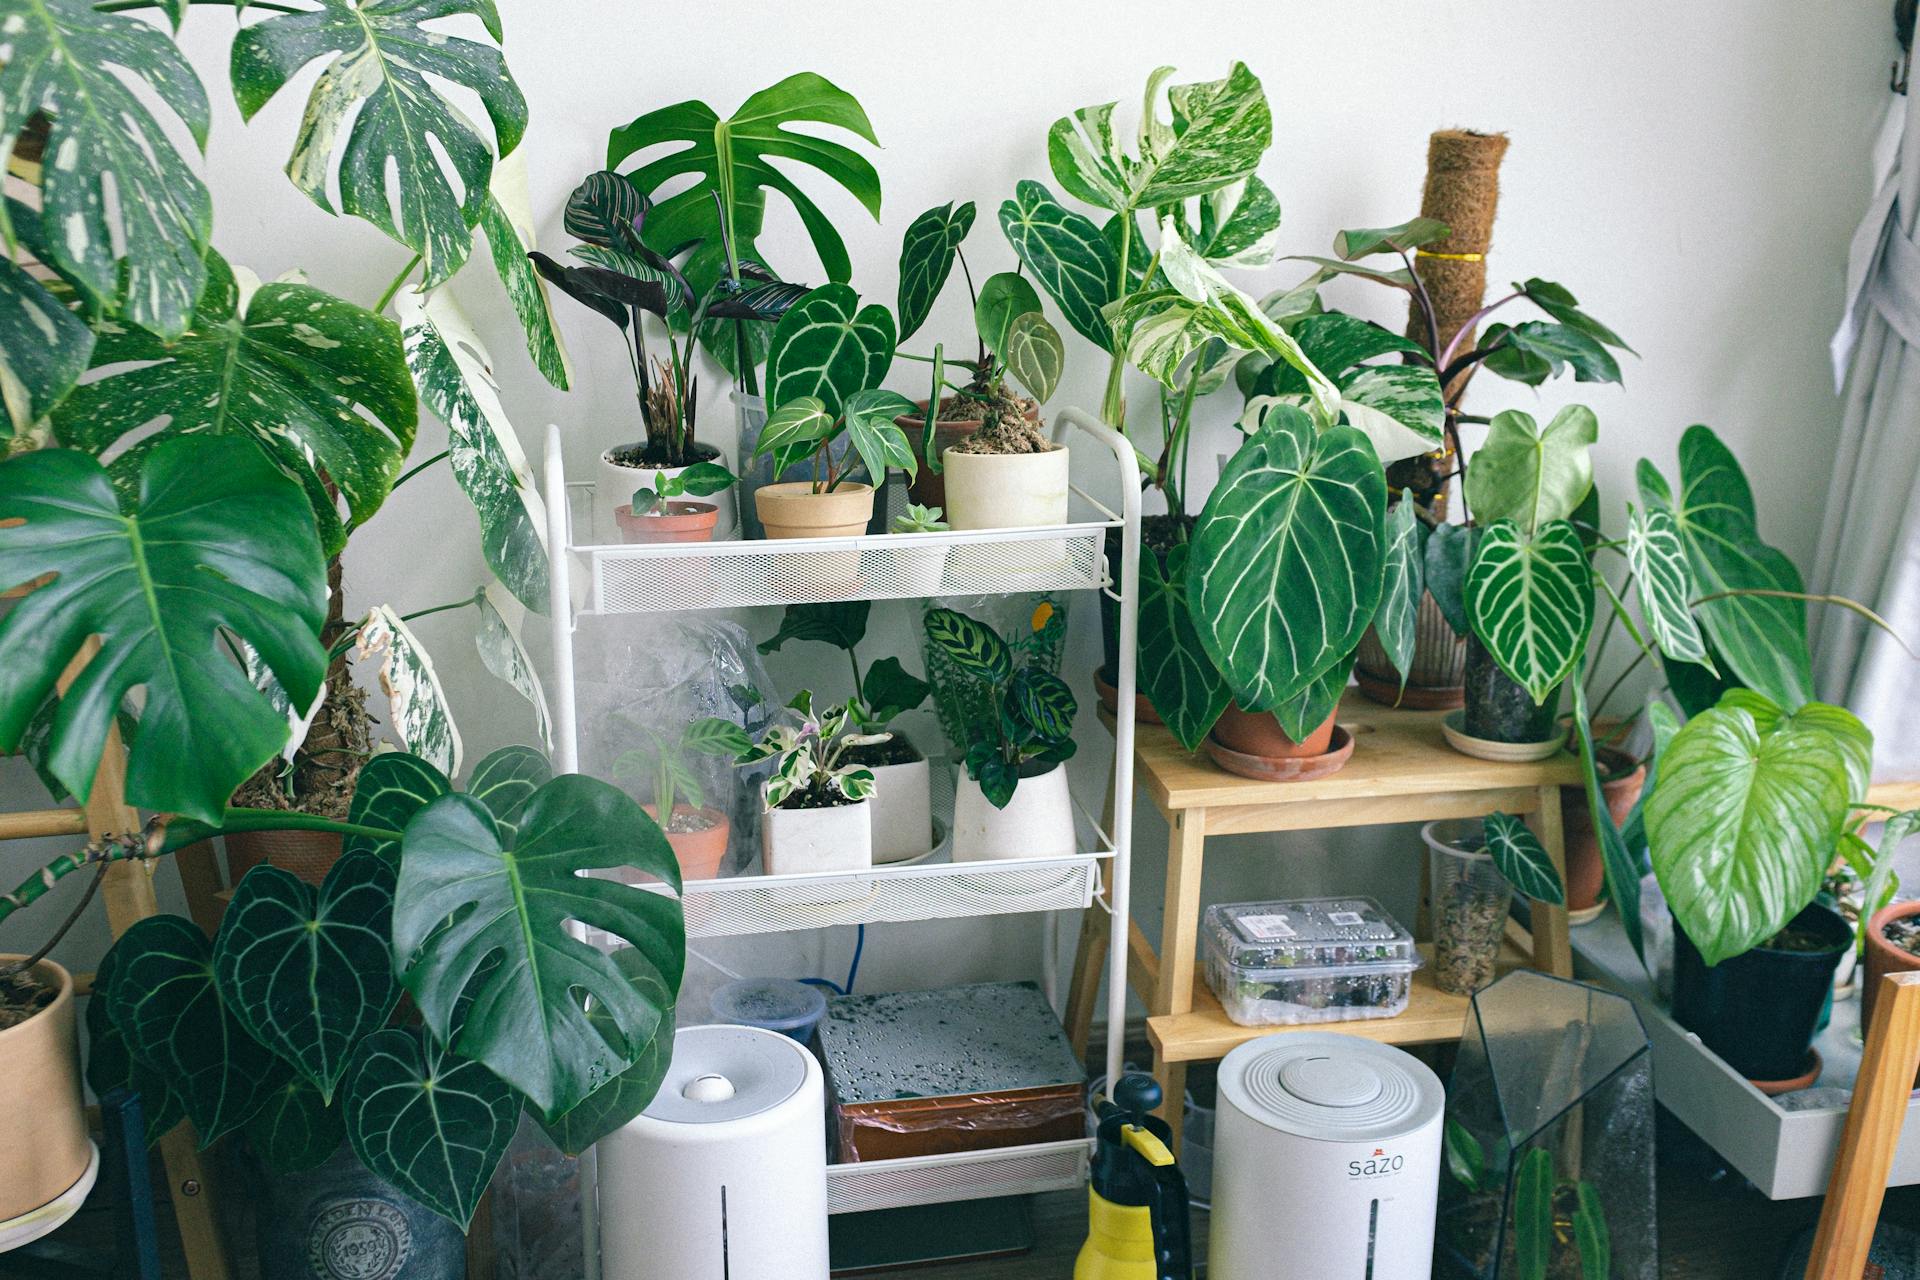
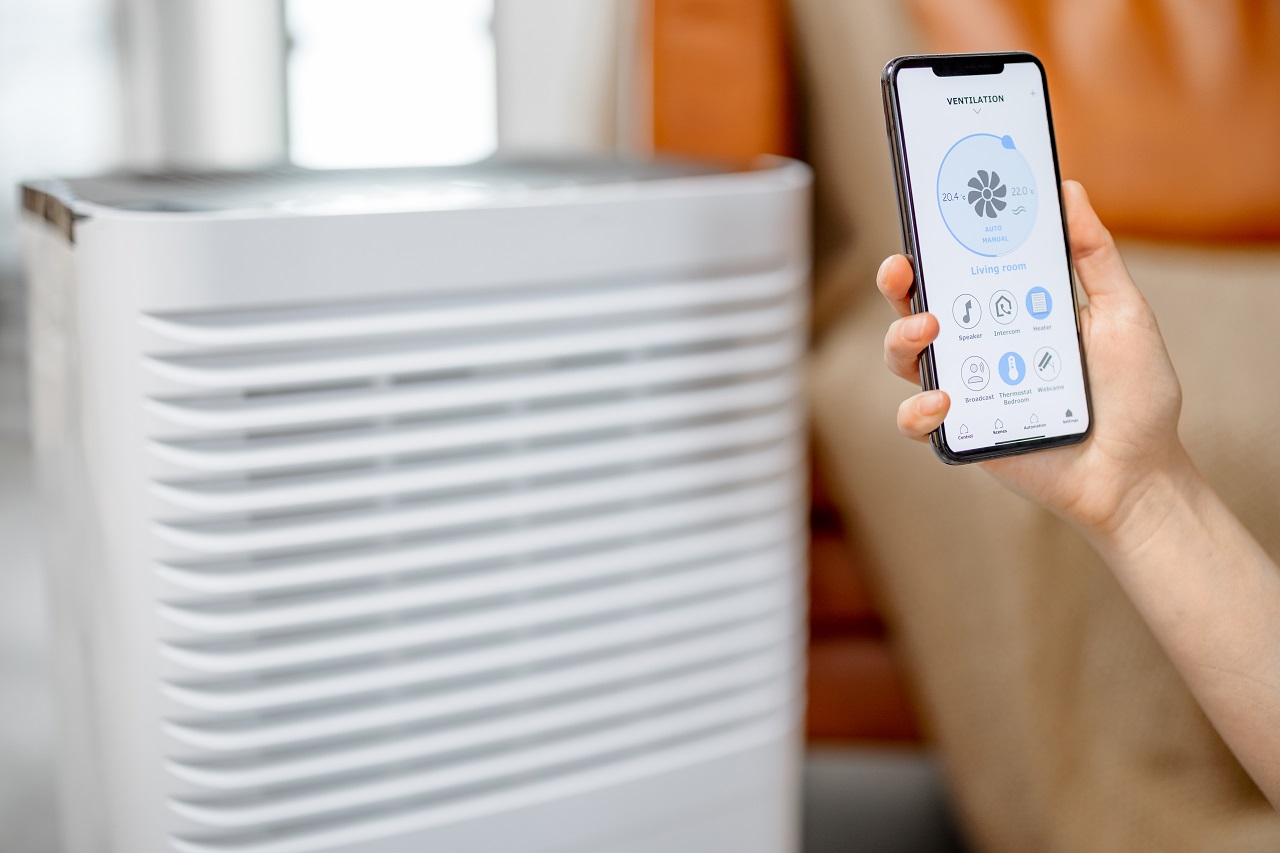
air purifier and plants

The air in your home significantly impacts your health and comfort. Breathing clean, fresh air can improve your overall well-being and help you avoid health issues like allergies and respiratory problems. Many people think that keeping the air inside the house fresh requires complicated and expensive solutions. However, simple steps can make a big difference in maintaining good indoor air quality.

One of the easiest ways to ensure your home’s air stays fresh is by understanding and maintaining indoor air quality. Regular upkeep of your HVAC system also plays a crucial role in keeping the air clean. A well-maintained HVAC system can filter out pollutants and circulate fresh air throughout your home.

Adding good ventilation practices and using tools like air purifiers can also enhance the air quality. Plants are another natural option that can help purify the air. These simple, everyday actions can drastically improve the air you breathe inside your home, ensuring a healthier and more comfortable living environment. Taking care of your indoor air doesn’t have to be complicated or time-consuming, but it does require attention and a few thoughtful changes.

Understanding the Importance of Indoor Air Quality

Indoor air quality (IAQ) directly affects your health and comfort. Poor air quality can lead to various health problems, including allergies, asthma, and other respiratory issues. Dust, pollen, pet dander, mold spores, and even household chemicals can pollute the air inside your home. These pollutants can cause discomfort and serious health problems if not managed properly.

Improved IAQ makes your home more comfortable and healthier. For example, cleaner air can help reduce symptoms for those with allergies or asthma. Even if you don’t have respiratory issues, breathing clean air can make you feel better and more energetic. Keeping your home’s air clean is important for everyone who lives there, including pets.

Maintaining good IAQ is not difficult. Regularly cleaning your home, using air purifiers, and ensuring proper ventilation are simple steps that make a big difference. It’s also important to have your HVAC system checked and maintained regularly to help keep the air clean and fresh.

Regular HVAC Maintenance for Better Air

Your HVAC system plays a crucial role in maintaining good indoor air quality. When your system is clean and well-maintained, it effectively filters out dust, pollen, and other pollutants. Regular maintenance prevents these particles from circulating in your home’s air.

One essential maintenance task is changing the HVAC filters regularly. Dirty filters can’t trap pollutants effectively, and they can even circulate dust and dirt through your home. Check your filters monthly and replace them when they are dirty, typically every 1-3 months depending on your home’s air quality and the filter type.

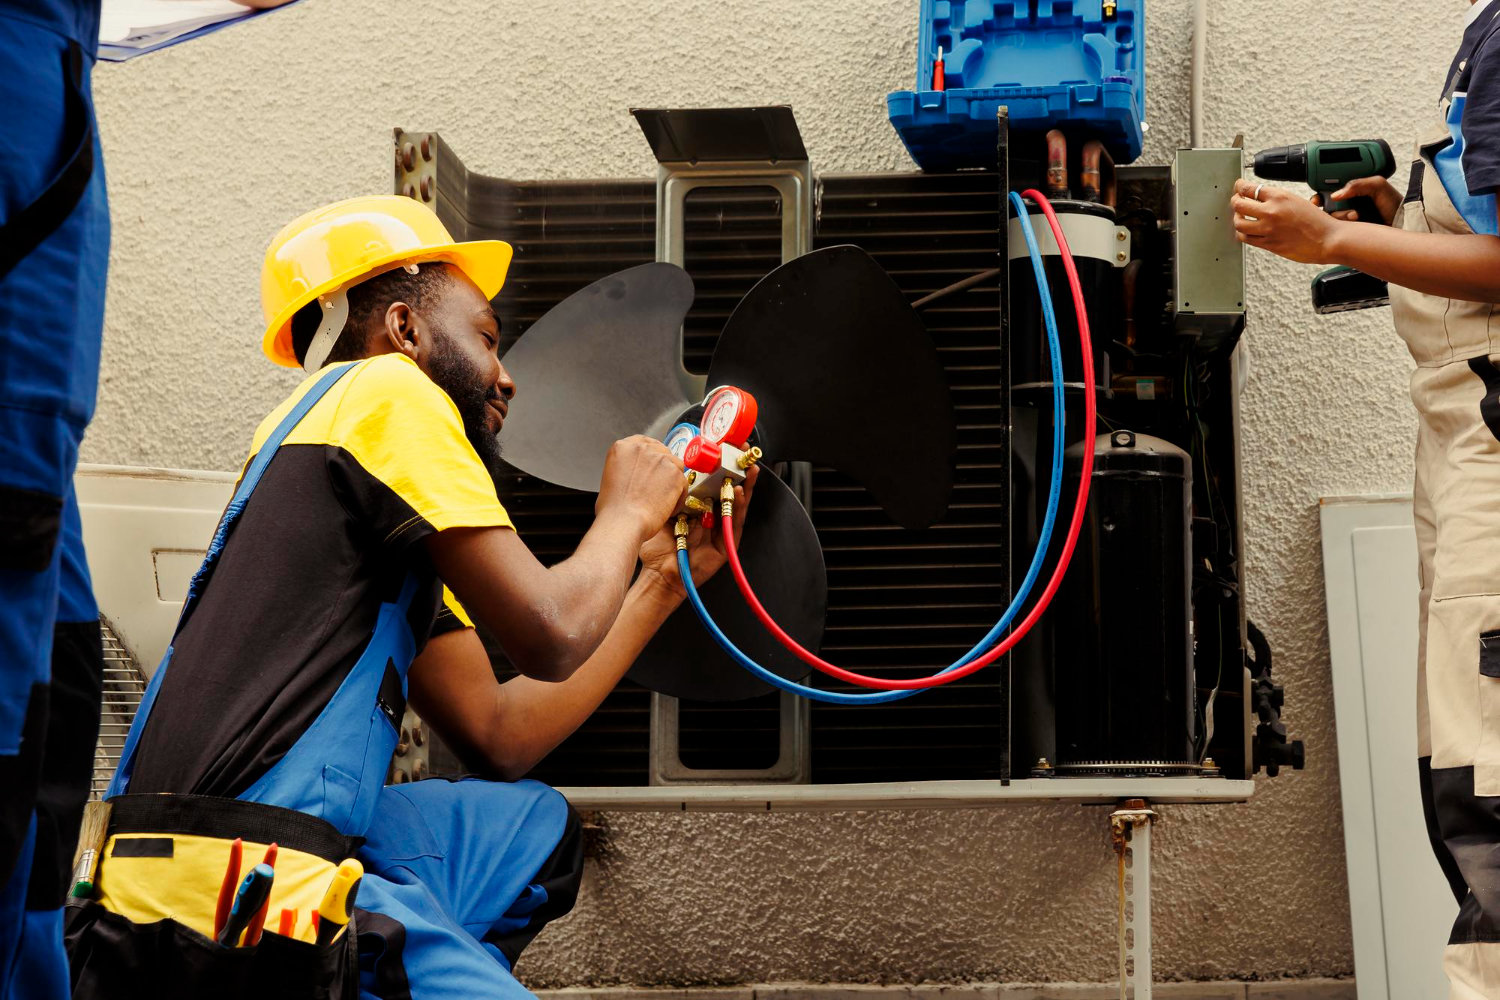
Another important task is scheduling regular HVAC tune-ups. These tune-ups involve a professional inspecting and cleaning the system, ensuring it runs efficiently. This maintenance includes cleaning the coils, checking the refrigerant levels, and inspecting the ducts for leaks or blockages. A well-maintained HVAC system not only keeps the air cleaner but also runs more efficiently, saving you money on energy bills.

Regular maintenance of your HVAC system is a simple yet effective way to ensure that the air in your home stays fresh and clean. Make it a habit to take care of your system, and you’ll enjoy better air quality and a more comfortable living environment.

Easy Ventilation Tips to Improve Airflow

Good ventilation is key to maintaining fresh air in your home. Proper airflow helps remove stale air and pollutants while bringing in clean air from outside. Here are some simple tips to improve ventilation in your home:

1. Open Windows and Doors: The easiest way to improve ventilation is by opening windows and doors. Even if it’s just for a few minutes each day, this can help to let in fresh air and let out stale air.

2. Use Exhaust Fans: Install exhaust fans in your kitchen and bathrooms. These fans help remove moisture and odors, reducing the risk of mold growth. Turn them on while cooking or showering to improve airflow.

3. Strategic Use of Fans: Using fans can help circulate air throughout your home. Place box fans in windows, facing outwards, to push stale air outside. Ceiling fans can also help by circulating indoor air, making it feel fresher.

4. Keep Vents Open and Unblocked: Ensure that air vents and registers are open and not blocked by furniture or other items. This allows your HVAC system to distribute air evenly throughout your home.

Improving ventilation may involve a few changes to your daily routine, but it can make a significant difference in your home’s air quality. These simple steps help ensure a healthier and more comfortable living environment.

Using Air Purifiers and Plants to Enhance Air Freshness

Air purifiers and plants are great tools for keeping your home’s air fresh and clean. These additions to your home can make a noticeable difference in air quality.

Air Purifiers: Air purifiers remove pollutants from the air, such as dust, pollen, pet dander, and even odors. They are especially helpful for people with allergies or asthma. Choose a purifier with a HEPA filter for maximum effectiveness. Place them in rooms where you spend the most time, like bedrooms and living areas. Regularly change the filters to keep the purifier working well.

Plants: Houseplants not only add beauty to your home but also help clean the air. Certain plants, like spider plants, peace lilies, and snake plants, are known for their air-purifying abilities. They absorb pollutants and release fresh oxygen. Place a few plants in different rooms to help keep the air fresh.

Combining air purifiers with houseplants creates a powerful duo for maintaining healthy air. These solutions are easy to implement and provide continuous benefits for your home’s air quality. Regular care and maintenance, such as watering plants and cleaning the air purifiers, will ensure they remain effective.

Conclusion

Keeping your home’s air fresh and clean doesn’t have to be complicated. By understanding the importance of indoor air quality, maintaining your HVAC system, improving ventilation, and using air purifiers and plants, you can create a healthier living environment for you and your family. Each of these steps is simple to implement and can make a significant impact on the air you breathe every day.

Remember, taking these actions not only benefits your health but also extends the life of your HVAC system and enhances the comfort of your home. Regularly addressing air quality helps prevent problems before they become serious, saving you time and money in the long run.

For expert assistance and advice on maintaining your home’s air quality, contact Turner On Services. Our team of professionals is ready to help you with all your HVAC and indoor air quality needs. Call us today to schedule a check-up and breathe easier knowing your home is in good hands.

How to Know If Your Indoor Air is Bad

Indoor air quality

Breathing clean air is essential for good health, but sometimes the air inside our homes isn’t as clean as it should be. Poor indoor air quality can cause a range of health issues and make your home uncomfortable. Knowing how to spot the signs of bad air in your house can help you take action to improve it and protect your family.

Common symptoms of poor indoor air include allergies, headaches, and even respiratory problems. Things like dust, mold, and fumes from cleaning products can all affect the air you breathe at home. Identifying these problems early can help you resolve them before they become more serious.

Improving indoor air quality isn’t just about comfort—it’s also about maintaining a healthy living environment. From simple steps like opening windows to using air purifiers, there are many ways to ensure your home’s air stays fresh and clean. This guide will help you understand what affects indoor air quality and how to make sure the air in your home is safe to breathe.

Signs of Poor Indoor Air Quality

Knowing how to spot bad air in your home can help you take action quickly. Some signs are obvious, while others might be less noticeable. Here are some common indicators that your indoor air quality might be poor:

1. Persistent Allergies and Respiratory Issues: Frequent sneezing, coughing, and shortness of breath can be signs of poor indoor air. If you notice that your symptoms worsen when you’re at home and improve when you’re out, your air quality might be the culprit.

2. Dust Buildup: Excessive dust on surfaces and in the air could indicate an issue with your home’s air filtration system. Regular cleaning doesn’t seem to make a difference, and dust returns quickly after you clean.

3. Mold and Mildew: The presence of mold or mildew, especially in damp areas like the bathroom or basement, is a clear sign of poor air quality. Mold spores in the air can cause health issues and damage your home.

4. Unpleasant Odors: Stale, musty, or foul odors that linger can indicate poor ventilation. These smells might come from mold, poor waste management, or unseen pollutants trapped inside your home.

5. Humidity Issues: High or low indoor humidity levels can affect air quality. High humidity promotes mold growth, while low humidity can cause dry skin and respiratory issues.

These signs are a good starting point for identifying air quality issues. If you notice one or more of these symptoms, it might be time to look into improving your indoor air.

Common Sources of Indoor Air Pollutants

Various pollutants can lower the quality of the air in your home. Identifying these sources can help you manage and reduce their impact. Here are some common sources of indoor air pollutants:

1. Household Cleaning Products: Many household cleaners contain harsh chemicals that release volatile organic compounds (VOCs) into the air. These can irritate your lungs and cause other health problems.

2. Pesticides and Chemicals: Products used to control pests often contain harmful chemicals. These chemicals can linger in the air and contribute to poor air quality.

3. Building Materials: Some building materials, such as asbestos, formaldehyde, and lead, can release harmful particles into the air. Older homes are especially at risk if these materials were used during construction.

4. Dust and Pet Dander: Dust mites and pet dander are common allergens found in many homes. These particles can worsen asthma and allergies if not regularly cleaned.

5. Mold and Mildew: Mold and mildew thrive in damp areas and release spores into the air. These spores can cause allergic reactions and respiratory problems.

Understanding these common pollutants can help you take steps to reduce their presence. Proper ventilation, regular cleaning, and using safer products can significantly improve your home’s air quality.

How Poor Air Quality Affects Health

Poor indoor air quality can have serious effects on your health. Breathing in polluted air over time can lead to both short-term and long-term health problems.

1. Respiratory Issues: Poor air quality can aggravate conditions like asthma and allergies. Symptoms include coughing, wheezing, and shortness of breath. Kids and older adults are especially vulnerable.

2. Headaches and Fatigue: Exposure to pollutants like VOCs and mold can cause headaches, dizziness, and fatigue. You might feel unusually tired or have trouble concentrating.

3. Skin and Eye Irritation: Pollutants in the air can cause dryness and irritation in your eyes and skin. You might notice redness, itching, or rashes that don’t go away with usual treatments.

4. Serious Health Conditions: Long-term exposure to indoor air pollutants can lead to more severe health problems like heart disease, lung cancer, and even damage to your nervous system. These conditions are serious and require medical attention.

Understanding how poor air quality affects your health underscores the importance of maintaining good indoor air. Taking steps to improve it can lead to a healthier and more comfortable home for your family.

Steps to Improve Indoor Air Quality

Improving the air quality in your home doesn’t have to be complicated. Here are some practical steps you can take to make your indoor air healthier:

1. Ventilate Your Home: Open windows and doors to let fresh air circulate. Use exhaust fans in the kitchen and bathrooms to remove moisture and fumes. This can help reduce the buildup of indoor pollutants.

2. Use Air Purifiers: Air purifiers with HEPA filters can help remove dust, pet dander, and other airborne particles. Place them in areas where you spend the most time, like the living room and bedroom.

3. Maintain Your HVAC System: Regular maintenance of your HVAC system is crucial. Change filters regularly and have your system inspected by professionals to ensure it’s working efficiently.

4. Control Humidity Levels: Keep your indoor humidity between 30% and 50%. Use a dehumidifier if necessary to prevent mold growth. Bathrooms and basements are common areas where humidity levels can get high.

5. Use Natural Cleaning Products: Switch to cleaning products that are free from harsh chemicals. Natural products can reduce the amount of VOCs released into your home.

6. Keep Your Home Clean: Regularly dust and vacuum your home to reduce pollutants. Pay special attention to carpets, rugs, and upholstered furniture, which can trap allergens.

By following these steps, you can significantly improve the air quality in your home, making it a healthier place to live.

Conclusion

Breathing clean air in your home is essential for your overall well-being. From identifying the signs of poor air quality to taking steps to improve it, maintaining good indoor air can prevent various health issues and make your home more comfortable. Regularly checking and improving your indoor air can lead to better health for you and your family.

Good indoor air quality is easy to achieve with a bit of effort and the right practices. Whether it’s ventilating your home, using air purifiers, or maintaining your HVAC system, each step makes a difference. Don’t overlook the importance of clean air—your health depends on it.

For more detailed help and to ensure your home’s air is always fresh and clean, contact Turner On Services. Our team in Cincinnati, Ohio, is ready to assist you with all your indoor air quality and HVAC needs. Call us today to make sure the air in your home is safe and healthy.

How to Fix Common Electrical Problems Safely

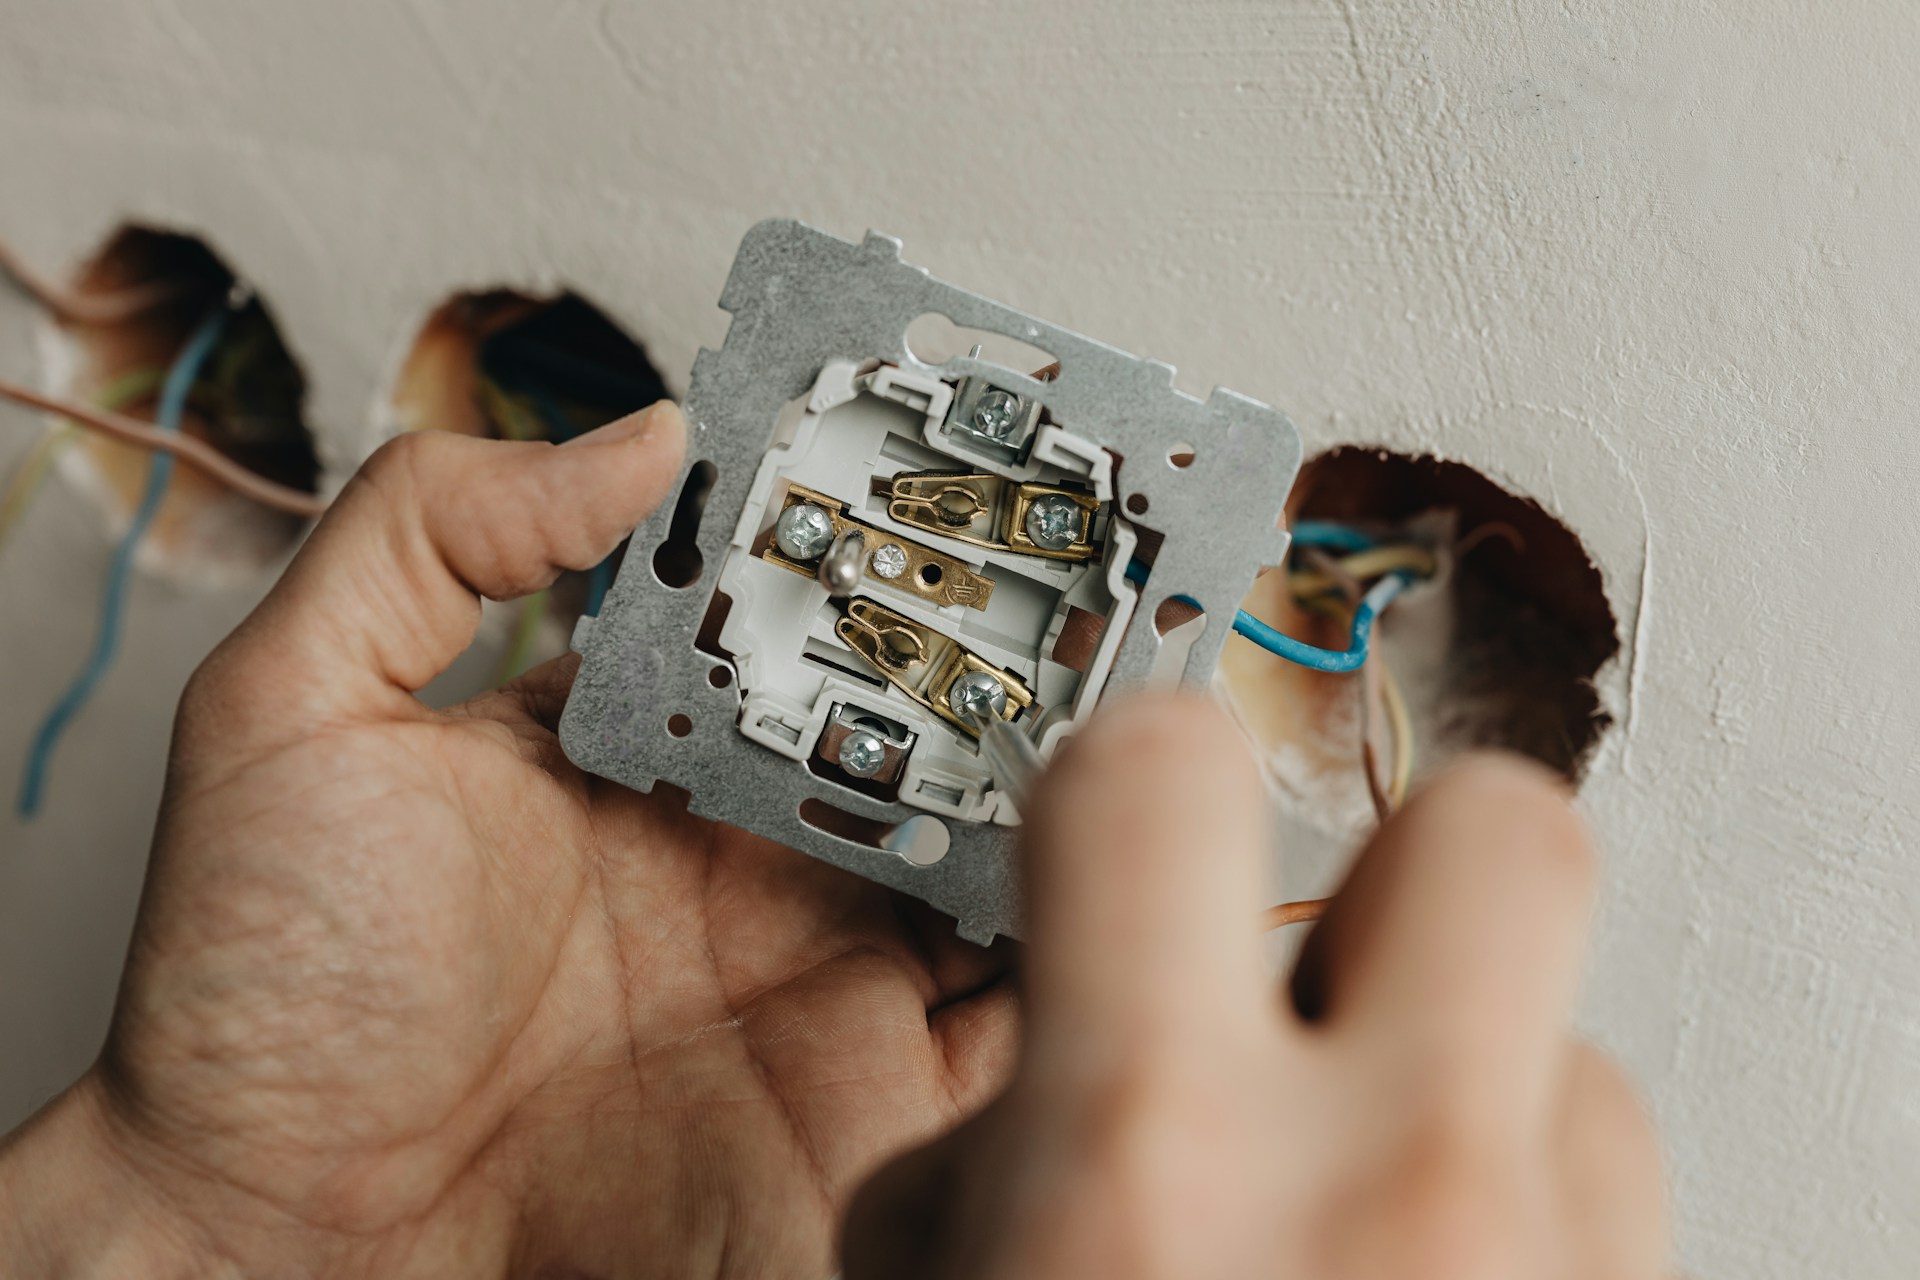
fix electrical problems

Dealing with electrical problems at home can be intimidating, but many common issues can be safely fixed with some basic knowledge and a few tools. Electrical problems like tripped circuit breakers, loose outlets, faulty light switches, and overloaded circuits can disrupt your daily life and pose safety hazards if not addressed promptly. Knowing how to identify and fix these problems can save you time, money, and the inconvenience of calling a professional for minor issues.

Before attempting any electrical work, safety should always be your top priority. Always turn off the power at the main circuit breaker before starting any repairs to avoid the risk of electric shock. Use insulated tools, wear rubber-soled shoes, and work in a dry environment to further ensure your safety. Understanding the basic components of your home’s electrical system can help you troubleshoot and fix common problems more effectively.

In this article, we’ll guide you through the steps to fix some of the most common electrical issues you might encounter at home. We’ll cover how to identify and reset tripped circuit breakers, fix loose electrical outlets, replace faulty light switches, and safely address overloaded circuits. With these tips, you can tackle everyday electrical problems safely and efficiently.

Identifying and Resetting Tripped Circuit Breakers

One of the most common electrical problems in homes is a tripped circuit breaker. A circuit breaker trips when it detects an overload or short circuit, cutting off the electrical flow to prevent damage and ensure safety. Identifying a tripped circuit breaker is usually straightforward. First, go to your electrical panel, which is often located in the basement, garage, or utility room. Look for a breaker that is in the “off” position or one that stands out from the others, as it may be slightly misaligned.

To reset a tripped circuit breaker, follow these steps:

1. Turn Off All Connected Devices: Before resetting the breaker, turn off or unplug all devices connected to the tripped circuit to avoid another trip.

2. Locate the Tripped Breaker: Find the breaker that is out of alignment or in the “off” position.

3. Flip the Breaker Off, Then On: Push the breaker fully to the “off” position and then back to the “on” position. You should hear a click as it resets.

If the breaker trips again immediately, there may be a more serious issue at hand, such as a short circuit or ground fault. In such cases, it’s best to call a professional for further inspection to ensure there are no underlying problems that could pose a safety risk.

Fixing Loose Electrical Outlets

Loose electrical outlets are another common issue that can be both annoying and dangerous. A loose outlet can create a fire hazard due to poor contact between the plug and the outlet. Over time, this poor contact can cause arcing, which produces heat and can ignite surrounding materials. Fixing a loose outlet is a simple task that requires minimal tools.

Here’s how to fix a loose electrical outlet:

1. Turn Off Power: Always start by turning off the power to the outlet at the main circuit breaker to ensure your safety.

2. Remove the Outlet Cover: Use a screwdriver to remove the screws holding the outlet cover in place, and then remove the cover.

3. Tighten the Screws: Check the mounting screws that hold the outlet in place. If they are loose, tighten them with a screwdriver. Sometimes, the electrical box itself may be loose. In that case, gently tighten the screws that secure the box to the wall.

4. Add Shims if Necessary: If the outlet is still loose, you can use outlet shims or small washers to fill any gaps between the outlet and the electrical box, ensuring a snug fit.

5. Replace the Outlet Cover: Once everything is secure, replace the outlet cover and turn the power back on.

Fixing loose outlets not only improves safety but also makes it easier to plug in devices without the outlet moving. Following these simple steps can help you address this common issue quickly and effectively.

Replacing Faulty Light Switches

A faulty light switch can be frustrating and may pose a safety risk. Common symptoms of a faulty switch include flickering lights, the switch feeling warm to the touch, or a buzzing sound when you turn it on. If you experience any of these issues, replacing the light switch is a good idea.

Here’s how to replace a faulty light switch safely:

1. Turn Off Power: Turn off the power to the switch at the main circuit breaker.

2. Remove the Switch Plate: Use a screwdriver to take off the cover plate. Then, unscrew the mounting screws that hold the switch in place.

3. Inspect Wiring: Carefully pull the switch out of the electrical box and inspect the wiring. Note where each wire is connected so you can attach them to the new switch in the same way.

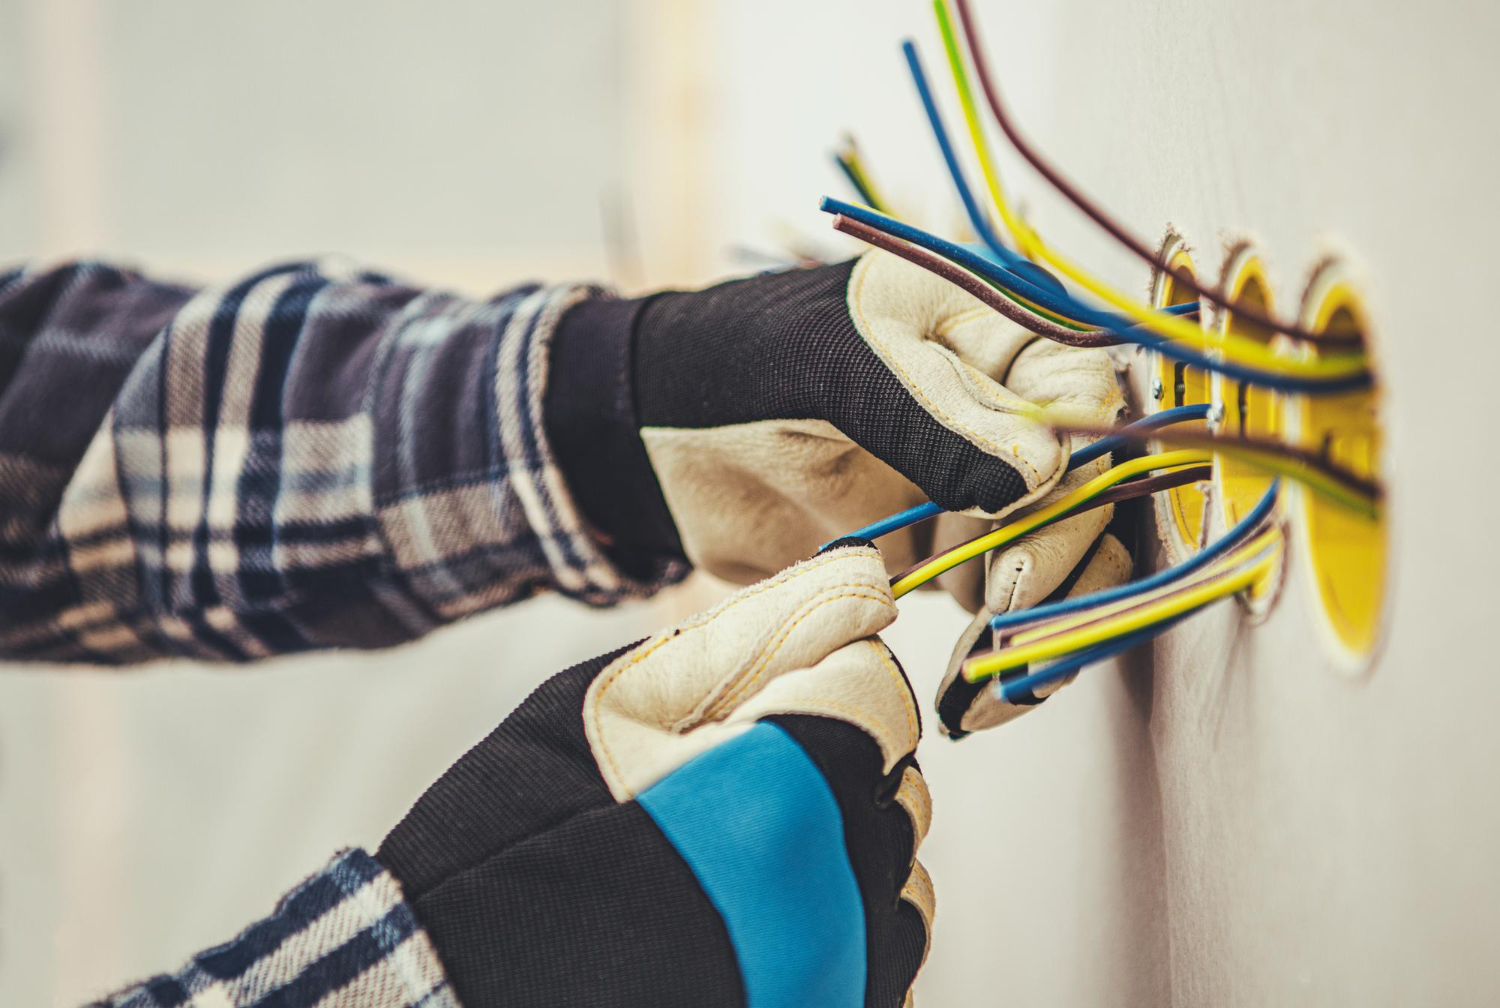
4. Remove the Old Switch: Disconnect the wires from the old switch. You may need a screwdriver to loosen the screws or pliers to pull the wires off.

5. Install the New Switch: Connect the wires to the new switch, following the same configuration as the old one. Tighten the screws to secure the wires.

6. Reattach the Switch and Cover Plate: Place the new switch into the electrical box, screw it in place, and reattach the cover plate.

7. Restore Power: Turn the power back on at the circuit breaker and test the new switch to ensure it works correctly.

Replacing a faulty light switch is a straightforward process that improves safety and restores proper function to your lighting system. Always remember to follow safety precautions when working with electricity.

Safely Addressing Overloaded Circuits

An overloaded circuit occurs when too many electrical devices are connected to a single circuit, exceeding its capacity. This can trip the circuit breaker or even cause electrical fires. Recognizing and addressing overloaded circuits is essential for home safety.

To safely address an overloaded circuit, follow these steps:

1. Identify the Overloaded Circuit: Pay attention to which circuit breaker trips frequently. This indicates that the connected circuit is likely overloaded.

2. List Connected Devices: Make a list of all devices connected to the problematic circuit.

3. Redistribute Electrical Load: Unplug some devices and distribute them across other circuits if possible. Avoid using extension cords as a long-term solution.

4. Upgrade Your Electrical System: If redistributing the load doesn’t solve the problem, consider upgrading your electrical system. This may involve adding more circuits or upgrading your breaker panel to handle a higher load.

5. Install Dedicated Circuits: For high-energy appliances like HVAC systems or electric dryers, installing dedicated circuits can prevent overloading and ensure safe operation.

Addressing overloaded circuits ensures that your electrical system operates safely and efficiently. By managing the electrical load, you can prevent frequent tripping and reduce the risk of electrical fires.

Final Thoughts

Understanding how to fix common electrical problems safely can empower you to maintain a safe and functional home. Whether you’re resetting tripped circuit breakers, fixing loose electrical outlets, replacing faulty light switches, or addressing overloaded circuits, proper knowledge and precautions are key. Following these guidelines can keep you and your family safe from potential electrical hazards.

While many electrical issues can be fixed with basic tools and a careful approach, some problems require professional expertise. When in doubt, it’s always best to consult a qualified electrician to ensure the safety and reliability of your electrical system.

For those who are more comfortable seeking professional help or have more complex electrical needs, don’t hesitate to reach out. Contact Turner On Services for expert electrical repair and services. Our team is ready to assist you with all your electrical needs and ensure your home remains safe and efficient.

Simple Tips to Save on Heating Bills

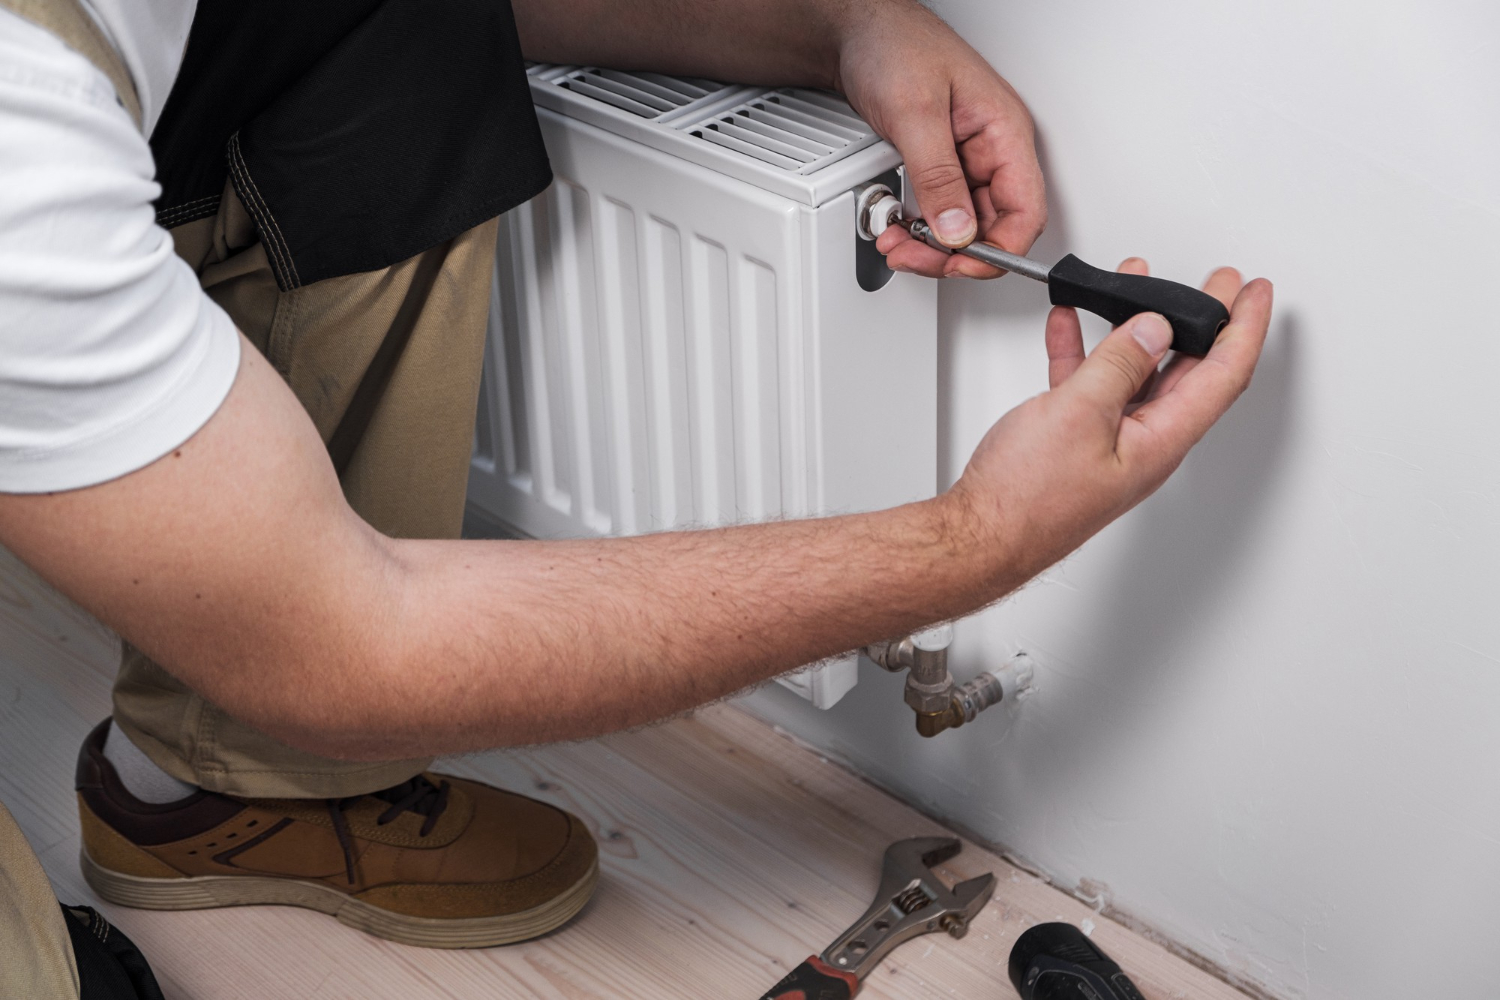
heating service

Winter is here, and with it comes the challenge of keeping your home warm without breaking the bank. Heating bills can quickly add up, making it essential to find ways to save money while maintaining a comfortable living environment. Fortunately, there are several strategies you can implement to reduce your heating costs effectively.

One of the key ways to lower your heating bills is by utilizing technology, such as programmable thermostats. These devices allow you to set customized heating schedules that match your daily routines, ensuring you’re not wasting energy when you don’t need it. Another vital aspect is ensuring your home is well-insulated. Proper insulation prevents heat from escaping, keeping your home warmer for longer and reducing the need for constant heating.

Regular maintenance of your HVAC system plays a significant role in keeping heating costs down. A well-maintained system runs more efficiently, uses less energy, and lasts longer, saving you money in the long run. Additionally, adopting simple energy-efficient habits can make a big difference. Small changes, like using curtains to retain heat or wearing warmer clothing indoors, can significantly impact your overall energy consumption.

In this article, we’ll explore practical tips to save on heating bills, focusing on using programmable thermostats, improving insulation, maintaining your HVAC system, and adopting energy-efficient habits at home. These steps will help you enjoy a warm and cozy home without the high costs.

Programmable Thermostats for Efficient Temperature Control

Programmable thermostats are a powerful tool to help you save on heating bills. These devices allow you to set heating schedules that align with your daily routines. For example, you can set the thermostat to lower the temperature when you’re at work or asleep and raise it before you return home or wake up. This ensures the heating system is only running when necessary, reducing energy waste and saving money.

Using a programmable thermostat is straightforward. Most modern models are user-friendly and come with a step-by-step setup guide. Once installed, you can program different temperature settings for weekdays and weekends, adapting to your lifestyle. Some advanced models even have Wi-Fi connectivity, allowing you to adjust settings remotely through a smartphone app.

Consider setting the thermostat to around 68°F when you’re home and awake, and lowering it by about 10-15 degrees at night or when you’re not at home. Studies suggest this can save you up to 10% a year on heating bills. The initial investment in a programmable thermostat pays off quickly through lower energy costs, making it a cost-effective solution for efficient temperature control.

Proper Insulation Techniques to Prevent Heat Loss

Proper insulation is crucial for maintaining indoor warmth and reducing heating costs. Insulation works by trapping heat inside your home, preventing it from escaping through walls, roofs, or floors. This results in less work for your heating system and lower energy bills.

Here are some techniques to ensure your home is properly insulated:

1. Check Existing Insulation: Inspect your attic, walls, and basement to ensure they have adequate insulation. Look for gaps, thin spots, or areas where the insulation is damaged.

2. Seal Drafts and Gaps: Use weatherstripping or caulk to seal gaps around windows, doors, and any other openings where heat might escape.

3. Insulate the Attic: The attic is one of the main areas where heat escapes. Adding or upgrading insulation here can make a significant difference in your home’s energy efficiency.

4. Use Insulating Window Treatments: Heavy curtains or thermal window treatments can help prevent heat loss through windows while adding an extra layer of insulation.

Another effective method is to wrap your water heater and pipes with insulating materials. This helps to reduce the amount of heat lost through these components, ensuring your water heater doesn’t have to work as hard.

By focusing on proper insulation, you can maintain a more consistent indoor temperature, reduce the burden on your heating system, and enjoy lower energy bills throughout the winter season.

Regular HVAC Maintenance for Optimal Performance

Maintaining your HVAC system is essential for keeping it running efficiently and saving money on heating bills. Regular maintenance ensures that your system is operating at its best, reducing the likelihood of breakdowns and extending its lifespan. A well-maintained HVAC system uses less energy, which can significantly lower your heating costs.

Here’s a simple checklist for HVAC maintenance:

1. Change Air Filters: Dirty filters can restrict airflow, making your system work harder. Change air filters every one to three months to keep the air flowing smoothly.

2. Inspect and Clean Ducts: Ensure your ducts are free of dust and debris. Clean ducts improve airflow and system efficiency.

3. Check Thermostat Settings: Make sure your thermostat is set correctly and functioning properly to maintain the desired temperature.

4. Lubricate Moving Parts: Parts like motors, belts, and fans need lubrication to reduce friction and wear. This keeps your system running smoothly.

5. Inspect System Components: Regularly check the blower, motor, and electrical connections for any signs of wear or damage.

Scheduling professional maintenance at least once a year ensures thorough inspection and tuning of your HVAC system. Technicians can identify and address potential issues before they become costly problems. Keeping your system in top shape not only enhances performance but also results in significant savings on your heating bills.

Energy-Efficient Habits to Implement at Home

Adopting energy-efficient habits can make a big difference in your heating bills. Small changes in your daily routine can lead to significant energy savings without compromising your comfort.

Here are some simple, energy-efficient habits to implement at home:

1. Use Natural Sunlight: Open curtains and blinds during the day to let in sunlight, which naturally warms your home.

2. Wear Warm Clothing: Layering up indoors reduces the need to turn up the heat, helping you stay warm and save energy.

3. Lower Thermostat When Away: Set your thermostat to a lower temperature when you are not at home or when you’re sleeping.

4. Zone Heating: Use space heaters in commonly used rooms to warm them up quickly without heating the whole house.

5. Close Off Unused Rooms: Shut doors to rooms you don’t use regularly to prevent heat from escaping into these areas.

Another effective habit is regularly checking and maintaining weatherstripping around doors and windows. This helps seal in warm air and keeps cold air out. Additionally, using a draft stopper or placing rugs along all doors can create an extra barrier against the cold.

By incorporating these energy-efficient habits, you can optimize your home’s heating efficiency and enjoy lower heating bills throughout the cold months.

Final Thoughts

Saving on heating bills is achievable with a few strategic changes and regular maintenance. Using programmable thermostats, ensuring proper insulation, maintaining your HVAC system, and adopting energy-efficient habits are practical steps you can take. These measures not only save you money but also contribute to a more comfortable and energy-efficient home.

It’s important to stay proactive and attentive to your home’s heating needs. By following these tips, you can keep your home warm and cozy without the high costs. Remember, regular HVAC maintenance and proper insulation are key elements in optimizing your home’s energy efficiency.

If you need professional assistance with your HVAC system or want to learn more about energy-saving solutions, contact Turner On Services. Let our experts help you ensure your home remains comfortable and energy-efficient throughout the year.

How to Know When Your HVAC Needs Service

HVAC service

Knowing when your HVAC system needs service can save you from uncomfortable temperatures and expensive repairs. Regular maintenance is key to ensuring your heating and cooling system runs efficiently and reliably year-round. Ignoring warning signs can lead to bigger issues down the line, affecting your comfort and your wallet.

One of the first signs that your HVAC system may need attention is unusual sounds or smells. These can indicate problems that need immediate fixing to prevent further damage. Another common issue is inconsistent temperatures or poor airflow, which can make certain areas of your home uncomfortable and indicate problems within the system.

High energy bills can also be a clue that your HVAC system isn’t operating efficiently. If your energy costs have spiked without a clear reason, it might be time to call in a professional. Visible leaks and the age of your HVAC system are other red flags that should not be ignored. Older systems or those showing signs of wear and tear often need servicing to keep them running smoothly.

In this article, we’ll go over these key signs and provide you with the knowledge you need to decide when it’s time to service your HVAC system. Being proactive can help keep your home comfortable and your HVAC system in top shape.

Unusual Sounds and Smells

One of the first signs that your HVAC system may require service is the presence of unusual sounds and smells. If you hear banging, clanking, or screeching noises when your HVAC system is running, it could signal a mechanical problem. These sounds might indicate that parts are loose, broken, or worn out and need immediate attention. Ignoring these noises can lead to bigger issues and costly repairs.

Similarly, strange smells emanating from your HVAC system should not be overlooked. A musty odor can indicate mold or mildew growth within the system, which not only affects the efficiency but also the air quality in your home. A burning smell could suggest an electrical problem or an overheating component that needs urgent repair. Foul odors may come from a buildup of dust and debris, signifying that your ducts and filters need cleaning.

By paying attention to these sensory signals, you can catch problems early and prevent them from escalating. Unusual sounds and smells often serve as a warning that something is wrong, giving you the opportunity to address the issues before they become major headaches.

Inconsistent Temperatures and Poor Airflow

Another sign that your HVAC system needs service is inconsistent temperatures or poor airflow throughout your home. If some rooms feel hotter or colder than others despite the thermostat settings, your HVAC system may not be distributing air properly. This inconsistency can result from blocked vents, ductwork issues, or a failing component within the system.

Poor airflow is another indicator of potential problems. If you notice weak air coming from your vents, it could be a sign that the blower motor isn’t working correctly or that there is a blockage in the ductwork. This issue can strain your HVAC system, causing it to work harder to maintain the desired temperature, which can lead to increased wear and tear and higher energy bills.

Addressing these issues promptly can help improve your home’s comfort and prolong the life of your HVAC system. Regular maintenance, such as changing air filters and checking for blockages, can prevent airflow problems and ensure your system operates efficiently. Monitoring for inconsistent temperatures and poor airflow allows you to catch and fix issues before they lead to more significant and costly repairs.

High Energy Bills and Frequent Cycles

An unexpected spike in your energy bills can be a strong indicator that your HVAC system needs servicing. If you’re noticing that your electricity or gas bills are higher than usual without a corresponding increase in usage, it might be because your HVAC system is struggling to maintain the desired temperature. This inefficiency can result from various issues like dirty filters, worn-out parts, or system components that need tuning or replacement.

Frequent cycling, where your HVAC system turns on and off more often than usual, is another telltale sign of potential problems. This can happen if the system is too large or small for your home, if there’s a thermostat issue, or if there’s a problem with the overall system efficiency. Constant cycling not only increases energy consumption but also puts additional stress on the system, which can lead to more wear and tear over time.

Both high energy bills and frequent cycling can indicate that your system is working harder than it should. Addressing these issues promptly can help reduce your energy costs and extend the life of your HVAC unit. Regular maintenance checks and timely repairs can help keep these problems at bay, ensuring your system runs efficiently.

Visible Leaks and System Age

Visible leaks around your HVAC unit are a clear sign that something isn’t right. These leaks could be refrigerant or water, both of which require immediate attention. A refrigerant leak can compromise the cooling efficiency of your system and may pose health risks, while water leaks can lead to mold growth and structural damage in your home. Inspect the area around your HVAC unit regularly and contact a professional if you notice any leaks.

The age of your HVAC system is another critical factor to consider. Most HVAC systems have a lifespan of about 15-20 years. As the system ages, it becomes less efficient and more prone to breakdowns. Older systems may also lack the modern features and energy efficiency standards found in newer models. If your system is nearing the end of its expected lifespan, it’s wise to consider planning for a replacement rather than investing heavily in repairs.

Keeping an eye on visible signs like leaks and being aware of your system’s age can help you decide when it’s time for service or even replacement. Regular inspections and maintenance can help you catch these issues early, ensuring your home stays comfortable and your HVAC system runs efficiently.

Final Thoughts

Understanding the signs that indicate your HVAC system needs service can help you maintain a comfortable and safe home. Paying attention to unusual sounds and smells, inconsistent temperatures and poor airflow, high energy bills and frequent cycles, as well as visible leaks and the system’s age, can prevent small issues from becoming costly problems.

Regular maintenance and prompt, professional service can save you money in the long run and extend the life of your HVAC system. Acting quickly when you notice these warning signs helps to ensure your system operates efficiently and effectively, keeping your home at the perfect temperature year-round.

If you suspect your HVAC system needs service or if you’d like to schedule a routine maintenance check, contact Turner On Services. Our experienced technicians are ready to help you keep your home comfortable and your HVAC system in top condition. Call us today to book your HVAC service appointment and ensure your system is running smoothly.

Innovative Electrical Upgrades That Boost Your Home’s Value

electrical system upgrade

Electric upgrades are more than just a necessity for troubleshooting issues—they are a strategic investment in the modernization and enhancement of your home. As technology advances, the integration of sophisticated electrical systems not only meets the increasing demands for efficiency and safety but also significantly boosts the value of properties. Whether for comfort, convenience, or compliance with current standards, these upgrades are crucial.

We understand the importance of staying updated with the latest technologies in the electrical and HVAC fields. The perfect merge of functionality and innovation in electrical upgrades is not only about installing new systems. It’s about enhancing the way we live, offering a seamless blend of convenience and increased efficiency. By incorporating state-of-the-art electrical improvements, homeowners gain the dual benefit of enjoying current technology while augmenting the financial valuation of their property.

Join us as we explore various electrical upgrades that not only promise modernity and safety but ensure a smart investment that contributes to elevating your home’s market standing.

Understanding the Value of Electrical Upgrades in Modern Homes

In today’s smart and eco-conscious world, maintaining a modern home goes beyond cosmetic updates and extends into crucial systems like electrical upgrades. We have observed that many homeowners are initially hesitant about the need for these updates until they realize the profound impact on both their lifestyle and safety.

Electrical upgrades can significantly enhance the functionality and efficiency of your home, ensuring it meets current safety standards and accommodates the latest technological advancements. From upgraded wiring that supports more significant loads to modern circuit breakers that prevent overloading, these improvements form the backbone of a safe, functional, and future-ready home environment. This proactive approach not only addresses the immediate needs but also prepares your home for future innovations.

Key Electrical Upgrades That Enhance Home Value

Making informed decisions about which electrical upgrades to implement can substantially increase the value of your home. Here are some critical upgrades that we recommend:

1. Panel Upgrade: Replacing an outdated fuse box with a modern circuit breaker panel can significantly improve your home’s electrical capacity and safety, making it a highly appealing feature for potential buyers.

2. Surge Protection: Integrating whole-home surge protectors protects your expensive appliances and electronics from voltage spikes, demonstrating a well-maintained and secure home environment.

3. Energy-Efficient Lighting: Switching to LED lighting solutions not only reduces the energy bills but also enhances the ambiance and appeal of your home, boosting its market value.

4. Outdoor Lighting: Installing smart and energy-efficient outdoor lighting systems can improve the aesthetics of your property, increase security, and elevate the overall property appeal to prospective buyers.

By focusing on these strategic upgrades, we help homeowners not only improve their living experience but also boost their home’s market value, ensuring that every investment in your property’s electrical system pays dividends in comfort, safety, and resale value.

Implementing Smart Home Technologies for Increased Property Worth

As the world moves swiftly towards automation, incorporating smart home technologies into your property can be a transformative move to boost its value and appeal. Smart home technologies not only offer convenience and efficiency but also signify a modernized home that aligns with future living standards. We focus on integrating systems that control lighting, security, temperature, and even appliances through digital interactions, making daily routines much easier. An example of this is installing smart thermostats that adapt to your temperature preferences without constant manual adjustment, improving energy efficiency and household comfort.

Moreover, the integration of smart security systems that can be monitored from a smartphone offers homeowners peace of mind, an invaluable addition that prospective buyers find highly attractive. These systems provide real-time alerts and can detect potential issues before they become serious, adding a level of security that traditional systems cannot match. Our approach ensures that these technologies are not only seamlessly integrated into your existing electrical systems but also configured to bring out the best in functionality and ease of use, significantly enhancing your property’s marketability and living experience.

Maintaining and Safeguarding Your Electrical Investments

Ongoing maintenance is essential to preserving the integrity and functionality of new technological installations in your home. Regular checks and updates ensure that all systems operate at peak efficiency and are free from potential malfunctions that could lead to larger issues. Our team is committed to providing thorough inspections and maintenance services for all electrical and smart technology systems. This commitment ensures that every installation remains safe and functional long after installation, protecting your investment and continuing to enhance the value of your home.

Furthermore, we emphasize the importance of safeguarding these investments through tailored advice on managing and operating your new systems. From understanding the basics of system upkeep to receiving tips on optimizing system settings for energy savings, we support you every step of the way. Our goal is to ensure that these enhancements contribute effectively to your home’s value without creating additional burdens or risks.

Final Thoughts

It’s clear how vital electrical upgrades and smart technology integrations are to maintaining a modern, efficient, and highly desirable home. Not only do these investments increase the immediate usability and safety of your living environment, but they also offer long-term benefits by boosting your home’s appeal and market value.

Whether it’s through the intelligent use of smart home technologies or the strategic upgrading of your electrical systems, the approach should be comprehensive and well-informed. Remember, these improvements are not just renovations; they are investments in the future of your property.

If you’re ready to take your home into the future and elevate its value, contact us at Turner On Services. Let us help you make smart decisions that keep your home at the forefront of both technology and comfort. Trust us to deliver expertise and quality electrical service panel upgrades that you can depend on.

Fixing Simple Electrical Problems at Home

electrical repair

Electrical problems at home can be a real headache, but not all of them require a professional to fix. Some issues are simple enough for you to handle on your own with a bit of guidance. Understanding how to tackle these common problems can save you time and money while keeping your home safe.

From flickering lights to outlets that don’t work, small electrical issues can pop up from time to time. Knowing how to identify these problems is the first step in fixing them. It’s also essential to learn the basics of safely working with electricity to avoid any risks.

In this article, we’ll go over how to identify common electrical issues, safely reset a circuit breaker, replace a faulty outlet, and share tips for preventing electrical problems in the future. These steps will help you manage minor electrical repairs and keep your home’s electrical system in good shape. Let’s get started!

Identifying Common Electrical Issues

Before you can fix an electrical problem, you need to know what you’re dealing with. There are some common issues you might encounter at home. Being able to identify them quickly will help you decide whether you can handle the fix yourself or if you need a professional’s help.

One common issue is flickering lights. If your lights are flickering, it could be a sign of loose wiring or a problem with the light fixture itself. Check if the bulb is securely screwed in. If that doesn’t work, you might need to inspect the wiring for any loose connections.

Another frequent problem is outlets that don’t work. If an outlet isn’t providing power, check if it’s a GFCI outlet with a reset button. Press the reset button to see if power is restored. If that doesn’t work, you might have a tripped circuit breaker or a wiring issue.

Circuit breakers that trip often are another common problem. If you notice that your breaker trips frequently, your circuit might be overloaded. Unplug some devices and see if that solves the problem. If it doesn’t, you might need to investigate further or contact a professional.

How to Safely Reset a Circuit Breaker

Resetting a circuit breaker is one of the simplest electrical fixes you can do at home. Before you start, make sure your hands are dry, and you’re standing on a dry surface to avoid any electrical shock.

First, locate your electrical panel. It’s usually found in the basement, garage, or utility room. Open the panel door to see the breakers inside. The tripped breaker will be in the “off” position or somewhere between “on” and “off”. Identify which breaker is tripped.

Next, turn the tripped breaker to the “off” position. This step ensures the breaker is fully reset. After turning it off, flip the breaker back to the “on” position. You should hear a click when it’s securely in place. Check if the power is restored to the areas affected by the tripped breaker.

If the breaker trips again immediately, you likely have an ongoing issue such as an overload or a short circuit. In this case, unplug some devices and reset the breaker again. If it continues to trip, it’s a good idea to call a professional to inspect your electrical system. This way, you can address the underlying problem safely and effectively.

Replacing a Faulty Electrical Outlet

Replacing a faulty electrical outlet might sound daunting, but it’s a task you can handle with some basic tools and safety precautions. Before you start, make sure to turn off the power to the outlet at the circuit breaker. Use a voltage tester to confirm there’s no electricity flowing to the outlet.

Step 1: Remove the faceplate and outlet. Use a screwdriver to take off the faceplate. Then unscrew the outlet from the electrical box and gently pull it out. You’ll see wires connected to the outlet.

Step 2: Note the wire connections. Typically, you’ll find black (hot), white (neutral), and green or bare (ground) wires. Take a picture or make a note of how the wires are connected before you disconnect them.

Step 3: Disconnect and reconnect the wires. Loosen the screws holding the wires in place and disconnect them. Take your new outlet and attach the wires in the same way they were connected to the old one. Tighten the screws to secure the wires.

Step 4: Install the new outlet. Carefully push the wires back into the electrical box and screw the new outlet in place. Attach the faceplate, turn the power back on, and test the outlet to ensure it’s working.

Tips for Preventing Electrical Problems

Preventing electrical problems is always better than dealing with them after they occur. Here are some practical tips to help you keep your home’s electrical system in good shape:

1. Regular Inspections: Schedule regular electrical inspections to catch potential issues early. Look for signs of wear and tear on wires, outlets, and switches.

2. Replace Old Wiring: If your home’s wiring is old or outdated, consider updating it. Faulty wiring is a common cause of electrical fires.

3. Avoid Overloading Circuits: Be mindful of how many devices you plug into a single outlet. Overloading circuits can cause breakers to trip and even lead to fires. Use power strips with surge protectors to manage multiple devices.

4. Use Appliances Safely: Follow the manufacturer’s guidelines for using appliances. Avoid using damaged or frayed cords, and unplug appliances when not in use.

5. Install GFCI Outlets: Ground Fault Circuit Interrupter (GFCI) outlets are designed to prevent electrical shock. They are especially important in areas with water, like kitchens and bathrooms.

6. Educate Your Family: Teach your family about electrical safety, such as not yanking cords out of outlets and not using electronics near water.

Conclusion

Dealing with electrical problems at home doesn’t have to be daunting. By identifying common issues, safely resetting circuit breakers, and replacing faulty outlets, you can handle many problems yourself. Taking preventative measures can also help you avoid future issues and keep your home safe.

Remember, while DIY fixes are great for simple problems, some electrical issues require a professional touch. If you’re ever unsure or dealing with complex problems, it’s best to call in an expert.

For any electrical needs or regular maintenance, Turner On Services is here to help. Contact our Milford electricians today to ensure your home’s electrical system is safe and efficient. Your family’s safety is our top priority. Call Turner On Services for a reliable service you can trust!

Essential Maintenance for Long-Lasting HVAC Systems

HVAC system

A well-maintained HVAC system is crucial for keeping your home comfortable and your energy bills in check. By regularly performing essential maintenance tasks, you can extend the lifespan of your heating and cooling systems and ensure they operate efficiently. Regular upkeep not only helps prevent unexpected breakdowns but also ensures better indoor air quality and more consistent temperatures throughout your home.

Many homeowners may overlook simple maintenance tasks, but these tasks play a significant role in the durability and performance of HVAC systems. Neglecting maintenance can result in minor issues escalating into major problems that require costly repairs or replacements. Consistent care and attention can help you avoid these pitfalls and save money in the long run.

Understanding and implementing essential maintenance practices for your HVAC system can make a significant difference. From replacing filters to cleaning vents, these tasks are straightforward and can be easily integrated into your home maintenance routine. Taking proactive steps to maintain your HVAC system ensures it serves you well for years to come. Let’s dive into some essential maintenance tips to keep your HVAC system running smoothly.

Regular Filter Replacement

Replacing the filters in your HVAC system regularly is one of the simplest yet essential maintenance tasks. Filters play a critical role in trapping dust, allergens, and other airborne particles, keeping the air in your home clean. Over time, these filters can become clogged, reducing airflow and forcing your system to work harder. This can lead to increased energy consumption and even cause damage to your HVAC components.

Experts recommend checking and replacing your HVAC filters every one to three months, depending on the type of filter and your household conditions. For instance, homes with pets or residents with allergies may require more frequent filter changes. Always refer to your HVAC system’s manual for specific recommendations on filter replacement.

Changing your filters regularly not only helps your HVAC system run more efficiently but also extends its lifespan. It’s a straightforward task that involves removing the old filter, disposing of it, and inserting a new one. Ensuring that your filters are clean and free from debris keeps your system in peak condition and improves your indoor air quality.

Seasonal HVAC Inspections

Conducting seasonal HVAC inspections is crucial to ensure your heating and cooling systems are ready for the demands of summer and winter. These inspections allow you to catch potential issues early before they turn into costly repairs or significant breakdowns. Ideally, you should schedule a professional inspection at least twice a year—once in the spring before the cooling season and once in the fall before the heating season.

During a professional inspection, the technician will perform various checks and maintenance tasks, such as examining the thermostat settings, inspecting electrical connections, checking system controls, and lubricating moving parts. This thorough examination helps identify worn or damaged components that need replacement and assesses overall system performance.

Seasonal inspections can also include tasks like cleaning the coils and blower components, which can accumulate dirt and grime over time. These cleanings ensure optimal airflow and efficiency. Regular inspections not only boost your system’s efficiency but also help maintain a comfortable environment in your home throughout the year.

By investing in seasonal HVAC inspections, you are taking a proactive approach to maintaining your system’s health and avoiding unexpected problems. These inspections help keep your system running smoothly, reduce energy costs, and ensure your home remains comfortable through all seasons.

Cleaning and Clearing Vents and Ducts

Maintaining clean vents and ducts is essential for ensuring your HVAC system operates efficiently. Over time, dust, dirt, and debris can accumulate in these areas, obstructing airflow and forcing your system to work harder. Regularly cleaning and clearing your vents and ducts can improve indoor air quality and extend the lifespan of your HVAC system.

Start by removing vent covers and using a vacuum with a hose attachment to suck out any visible dust and debris. Be sure to reach as far into the ducts as possible. For a more thorough cleaning, consider using a brush to loosen any stubborn dirt that the vacuum might miss. It’s also a good idea to wipe down the vent covers before replacing them.

Professional duct cleaning services can provide a more comprehensive cleaning, especially if it has been a long time since your last cleaning or if you notice a significant amount of dust and debris. These services use specialized equipment to clean the entire ductwork, ensuring optimal airflow and efficiency.

Monitoring and Maintaining Thermostat Settings

A properly functioning thermostat is key to maintaining a comfortable home environment and ensuring your HVAC system runs efficiently. Monitoring and maintaining your thermostat settings can help you avoid unnecessary energy consumption and keep your system performing at its best.

First, make sure your thermostat is in a suitable location. Avoid placing it near heat sources, direct sunlight, or drafty areas, as these factors can cause inaccurate readings and disrupt the system’s performance. If you have an older, manual thermostat, consider upgrading to a programmable or smart thermostat. These modern thermostats offer better precision and allow you to set schedules that match your daily routines.

Regularly check the thermostat’s batteries and replace them if necessary. A weak battery can cause the thermostat to misread temperatures or fail to communicate effectively with your HVAC system. Additionally, it’s important to recalibrate your thermostat periodically to ensure accurate readings.

Conclusion

By performing essential maintenance tasks on your HVAC system, you not only ensure its longevity but also its efficiency and reliability. Regular filter replacements, seasonal inspections, cleaning vents and ducts, and monitoring your thermostat settings are all crucial steps to keep your system in top condition. These proactive measures can save you from costly repairs, reduce energy bills, and create a more comfortable and healthy living environment.

Taking the time to care for your HVAC system pays off in the long run. It helps you avoid unexpected breakdowns, maintain a consistent indoor temperature, and improve the air quality in your home. A well-maintained system ensures your home is always ready to handle the hot summers and cold winters.

For expert assistance in maintaining your HVAC system, trust our Milford electricians at Turner On Services. Our experienced technicians are ready to help you with all your HVAC needs, ensuring your home stays comfortable all year round. Contact Turner On Services today to schedule your maintenance service and keep your HVAC system running smoothly.

How to Cut Down on Your Cooling Costs

cooling cost

Keeping cool during the hot summer months can be expensive, but it doesn’t have to break the bank. You can take several steps to reduce your cooling costs without sacrificing comfort. By making some smart changes around your home, you can stay cool and save money at the same time.

One of the simplest ways to cut down on cooling costs is by managing your thermostat settings wisely. A programmable thermostat can help you set temperatures that change according to your daily routines, ensuring your AC isn’t running when you don’t need it.

Another effective strategy is improving your home’s insulation. Good insulation keeps the cool air inside and the hot air out, making your air conditioner’s job easier. Regular HVAC maintenance is also key to an efficient system. An optimized system runs better, uses less energy, and prevents costly breakdowns.

In this article, we will explore these tips in detail and share some energy-efficient cooling practices that can help you beat the heat while keeping your utility bills down. Let’s dive in and start saving on your cooling costs!

Install a Programmable Thermostat

One of the easiest ways to reduce your cooling costs is by installing a programmable thermostat. A programmable thermostat allows you to set different temperatures for different times of the day. This way, you can automatically adjust the cooling when you don’t need it. For example, you can set the temperature higher when you’re not at home and lower it just before you come back. This ensures that you’re not wasting energy cooling an empty house.

Using a programmable thermostat also makes it easier to establish cooling schedules that align with your daily routine. For instance, while you are asleep, you can set the temperature a few degrees higher, saving more energy. The thermostat will then lower the temperature just before you wake up, making it comfortable.

Many programmable thermostats even come with smart features that let you control them remotely through your phone. This gives you even more flexibility and potential for energy savings. If your plans change and you’re going to be home later than expected, you can easily adjust the settings from your phone, ensuring you only use cooling when needed.

Improve Your Home’s Insulation

Another effective way to cut down on cooling costs is by improving your home’s insulation. Good insulation acts as a barrier that keeps the cool air inside and the hot air outside, reducing the workload on your air conditioner.

Start by checking the insulation in your attic, as this is where much of the heat enters your home. Adding new insulation or replacing old, ineffective materials can make a significant difference. You should also inspect the walls and floors, as proper insulation in these areas helps maintain a steady indoor temperature.

Sealing any gaps or cracks around windows and doors is equally important. Use weather stripping or caulk to seal these openings. This prevents warm air from sneaking in and cool air from escaping. Even small gaps can lead to significant energy loss, so it’s worth taking the time to seal them properly.

Additionally, consider using thermal curtains or blinds. These window coverings help block out heat from the sun during the day, further reducing the strain on your air conditioning system. By improving your home’s insulation, you can create a more energy-efficient environment while keeping your cooling costs low.

Regularly Maintain Your HVAC System

Keeping your HVAC system well-maintained is crucial for reducing cooling costs. A well-maintained system runs more efficiently, uses less energy, and can even help prevent costly breakdowns.

Start by changing your air filters regularly. Dirty or clogged filters force your air conditioner to work harder, consuming more energy. Aim to check your filters once a month and replace them every 1 to 3 months, depending on the type and usage.

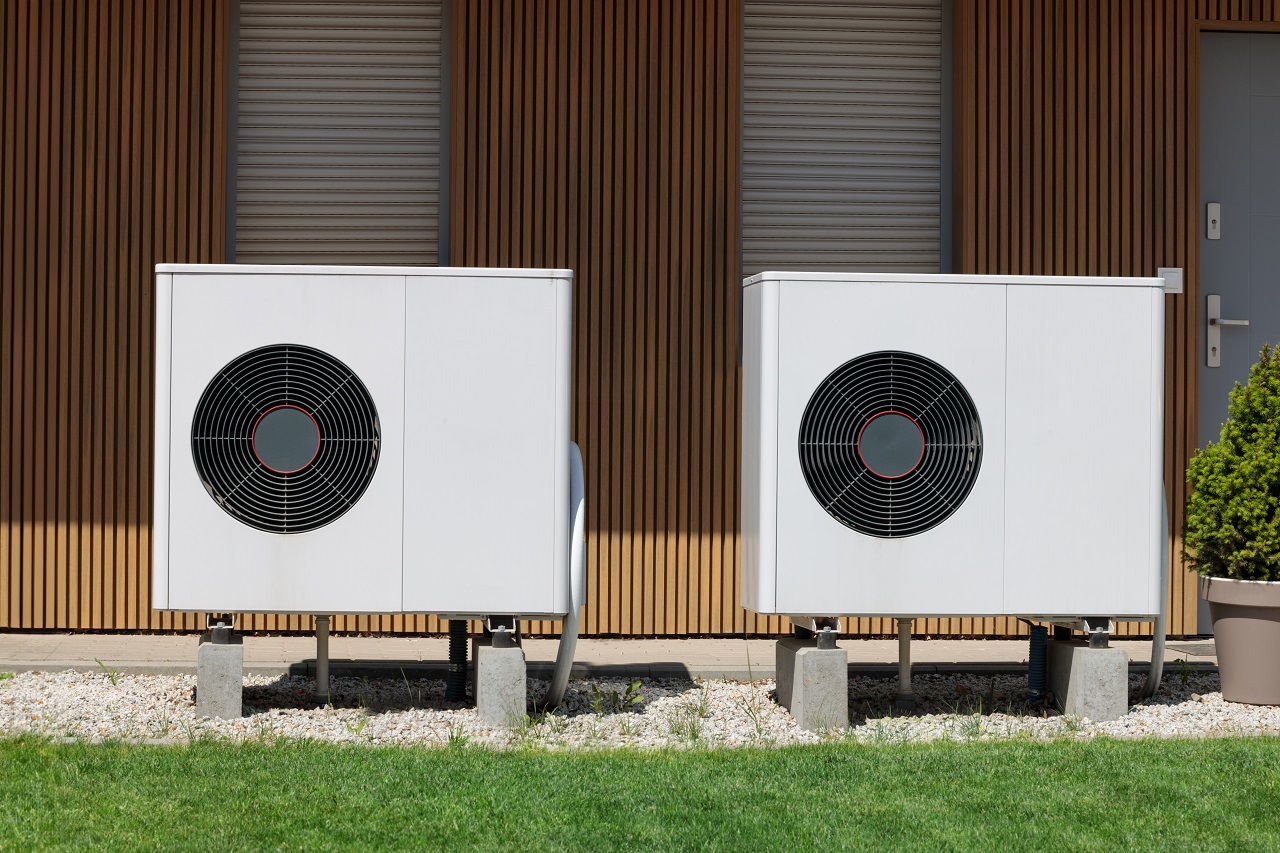
Another essential maintenance task is cleaning the outdoor unit. Over time, the outdoor condenser unit can get clogged with dirt, leaves, and debris, blocking airflow and reducing efficiency. Turn off the power and use a garden hose to gently clean the fins and remove debris.

Scheduling a professional HVAC tune-up at least once a year is also a good idea. A technician will inspect your system, checking for any potential issues and ensuring that everything is running smoothly. Regular maintenance helps extend the lifespan of your HVAC system and keeps it operating at peak efficiency.

Use Energy-Efficient Cooling Practices

Using energy-efficient cooling practices can make a big difference in your monthly utility bills. Here are some practical tips to help you save energy while keeping your home comfortable:

1. Ceiling Fans: Use ceiling fans to circulate air and create a wind-chill effect, making it feel cooler. This allows you to set the thermostat a few degrees higher without sacrificing comfort.

2. Close Blinds and Curtains: During the hottest parts of the day, close blinds and curtains to block out the sun’s rays. This helps keep your home cooler and reduces the need for air conditioning.

3. Avoid Heat-Generating Activities: Try to avoid using heat-generating appliances like ovens and dryers during the hottest parts of the day. Instead, cook meals during the cooler hours or use a microwave.

4. Ventilation: Use natural ventilation during the cooler parts of the day. Open windows and doors to let in cool air and create cross-ventilation, reducing the need for air conditioning.

5. Seal Air Leaks: Check for and seal air leaks around windows, doors, and ducts to prevent cool air from escaping and warm air from entering.

6. Thermostat Settings: Set your thermostat to the highest comfortable temperature. Each degree you raise the thermostat can result in significant energy savings.

Conclusion

Cutting down on cooling costs doesn’t have to be complicated. By installing a programmable thermostat, improving your home’s insulation, regularly maintaining your HVAC system, and adopting energy-efficient cooling practices, you can make a real difference in your energy bills.

Remember, the key to saving money is consistency. Making these changes and maintaining them over time will yield the best results. If you ever need more help or want to ensure your system is running as efficiently as possible, Turner On Services is here to help.

For expert advice and top-notch service, contact Turner On Services today. We’re your trusted HVAC specialists and electricians in Milford, ready to help you save money and stay comfortable all year long. Call Turner On Services now and start enjoying lower cooling costs and better indoor comfort!

How to Identify Poor Air Quality Indoors

indoor air quality

Breathing clean air in your home is essential for good health. However, poor indoor air quality can often go unnoticed until it starts causing problems. Identifying signs of poor air quality early on can help you take action to improve the air you breathe and protect your family’s health.

Common signs include symptoms like headaches, dizziness, and allergies. You might also notice unpleasant odors or excessive dust. These indicators can hint at underlying problems contributing to the air quality in your home.

Understanding where indoor air pollutants come from is key to addressing the issue. Everyday items like cleaning products, paints, and even furniture can release harmful chemicals. Poor ventilation can trap these pollutants inside, making the air in your home less healthy. Being aware of these sources helps you find ways to minimize exposure and keep your indoor air clean. Taking simple steps can make a big difference in maintaining a healthy living environment.

Common Signs of Poor Indoor Air Quality

Identifying poor indoor air quality can start with noticing common signs. Pay attention to your health and environment. Here are some signs to look out for:

1. Health Symptoms: Frequent headaches, dizziness, and tiredness can be due to poor air quality. If you or your family members experience these symptoms mostly at home, the air might be the problem.

2. Allergy Flare-Ups: Increased allergy symptoms like sneezing, coughing, and itchy eyes when indoors can signal problems. If symptoms improve when you leave home, check your air quality.

3. Odors and Stale Air: Persistent unpleasant smells or air that feels stuffy can be signs of poor ventilation. Proper ventilation is essential for good air quality.

4. Excessive Dust: Finding more dust than usual on surfaces can mean your air is carrying too many particles. This can be harmful, especially for people with respiratory issues.

5. Mold Growth: Mold spots on walls, ceilings, or around windows are indicators of moisture problems. Mold spores in the air can lead to health issues and worsen air quality.

Recognizing these signs can help you take action to improve your indoor air, making your home a healthier place to live.

Understanding the Sources of Indoor Air Pollutants

Knowing where indoor air pollutants come from is vital in tackling air quality problems. Many everyday items and activities can introduce pollutants into your home.

1. Household Cleaners: Many cleaning products contain chemicals that can evaporate into the air. Using these products in unventilated areas can increase indoor pollutants.

2. Paints and Varnishes: Fresh paint and varnishes release volatile organic compounds (VOCs) into the air. Even after they seem to be dry, these materials can continue to emit harmful chemicals.

3. Furniture and Carpets: New furniture and carpets can release formaldehyde and other chemicals. This off-gassing can affect air quality, especially in the first few months after installation.

4. Cooking: Cooking releases particles and fumes into the air, especially when using gas stoves. Proper ventilation during cooking helps reduce these pollutants.

5. Hobbies and Crafts: Activities like painting, gluing, or using solvents can introduce harmful chemicals into the air. Conduct these activities in well-ventilated areas.

Understanding these sources can help you reduce exposure by choosing less harmful products and improving ventilation. Small changes in your daily routine can make a significant difference in the air quality of your home.

The Impact of Poor Air Quality on Health

Poor indoor air quality can have a significant impact on your health. Understanding the potential risks can help you take steps to improve your home’s air. Breathing in polluted air can lead to various short-term and long-term health issues.

  • Short-Term Effects: You might experience headaches, dizziness, and fatigue quickly. Other symptoms include eye, nose, and throat irritation. These issues can make daily activities difficult and reduce your overall quality of life.
  • Long-Term Effects: Prolonged exposure to poor air quality can lead to more severe problems. Respiratory diseases such as asthma and bronchitis can develop or worsen. Some pollutants may even increase the risk of heart disease and cancer.
  • Vulnerable Groups: Children, the elderly, and people with pre-existing health conditions are more susceptible to the effects of poor air quality. Ensuring your home has clean air is essential for protecting the health of these vulnerable groups.

By recognizing these health impacts, you can prioritize improving your indoor air quality. This helps create a safer and more comfortable living environment for everyone in your home.

Tools and Methods to Measure Air Quality

Measuring indoor air quality is crucial for identifying problems and taking corrective actions. There are various tools and methods available to assess the air in your home.

  • Air Quality Monitors: These devices can measure levels of pollutants like VOCs, carbon dioxide, and particulate matter. They provide real-time data and alerts if levels exceed safe limits. Using an air quality monitor can give you a clear picture of your indoor environment.
  • Professional Testing: Hiring professionals to conduct air quality tests can be very effective. They use advanced equipment to measure various pollutants accurately. Professional assessments provide detailed reports and recommendations for improving air.
  • DIY Kits: Home test kits are available for detecting specific pollutants like radon and mold. These kits are easy to use and can help you identify specific issues quickly. Follow the instructions carefully for reliable results.
  • Regular Maintenance: Ensuring your HVAC system is well-maintained also helps. Regular filter changes and duct cleaning contribute to better air quality. An efficient HVAC system keeps the air fresh and reduces the presence of pollutants.

Using these tools and methods, you can keep track of your indoor air quality and take steps to improve it. This ensures a healthier home for you and your family.

Conclusion

Maintaining good indoor air quality is essential for your health and well-being. Recognizing the common signs of poor air quality, understanding the sources of pollutants, and knowing the health impacts are vital steps toward creating a healthier home. Utilizing tools and methods to measure and improve air quality can make a significant difference.

By taking proactive steps, you can ensure that the air you and your family breathe is clean and safe. Regular monitoring, using air quality devices, and maintaining your HVAC system are practical ways to achieve this. Investing time and effort into improving indoor air quality not only enhances comfort but also protects your health.

For expert assistance in improving your indoor air quality, contact Turner On Services. We provide top-notch services and indoor air quality solutions. Call our Milford electricians and HVAC specialists today to breathe easier and live healthier!