How to Fix Common Electrical Problems Safely

fix electrical problems

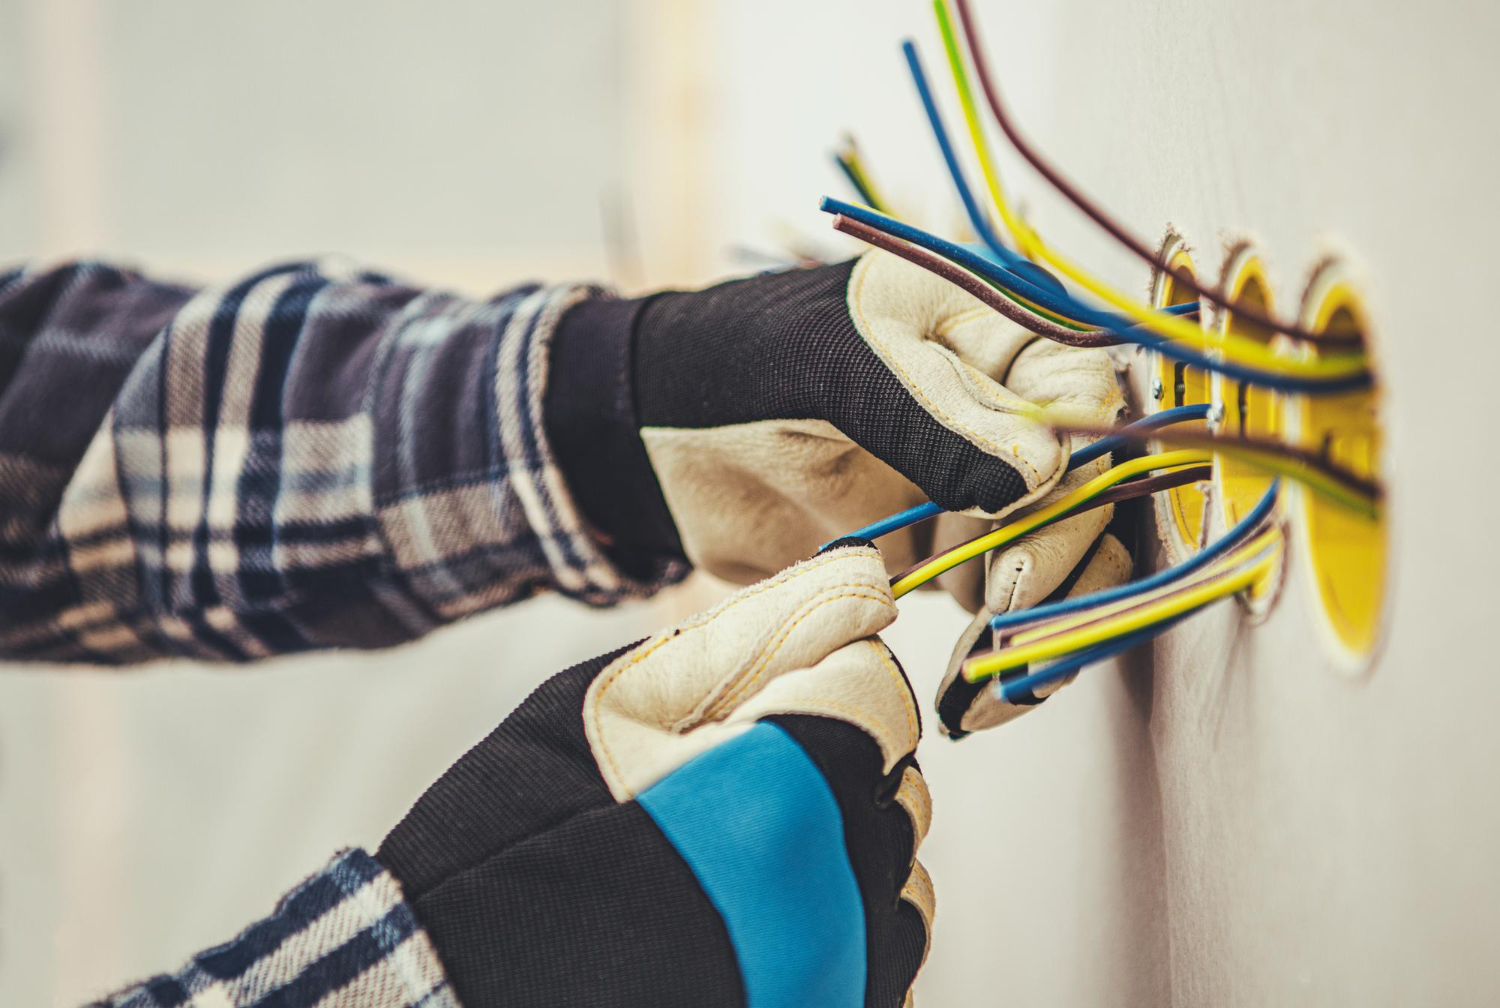
Dealing with electrical problems at home can be intimidating, but many common issues can be safely fixed with some basic knowledge and a few tools. Electrical problems like tripped circuit breakers, loose outlets, faulty light switches, and overloaded circuits can disrupt your daily life and pose safety hazards if not addressed promptly. Knowing how to identify and fix these problems can save you time, money, and the inconvenience of calling a professional for minor issues.

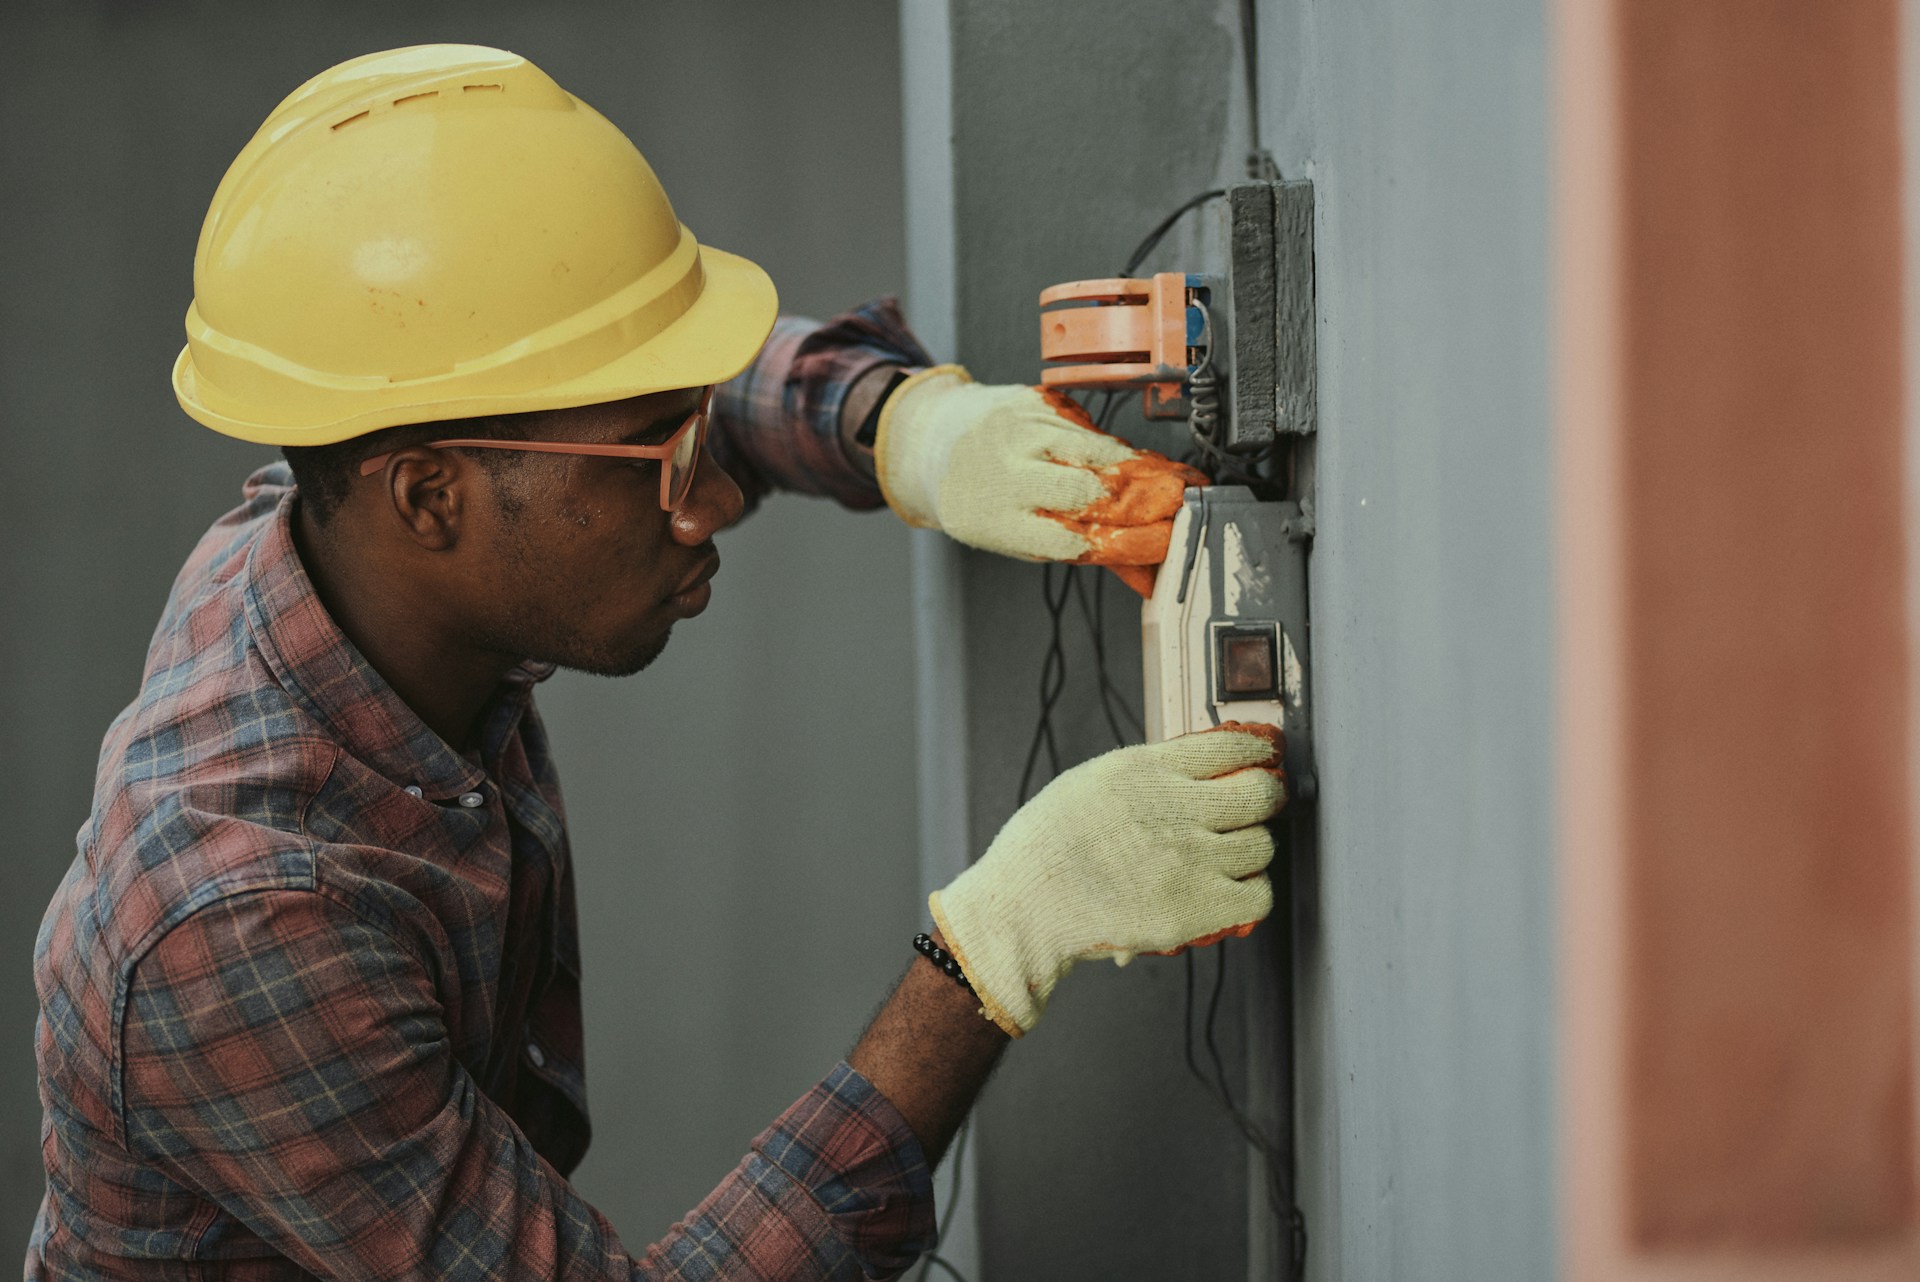
Before attempting any electrical work, safety should always be your top priority. Always turn off the power at the main circuit breaker before starting any repairs to avoid the risk of electric shock. Use insulated tools, wear rubber-soled shoes, and work in a dry environment to further ensure your safety. Understanding the basic components of your home’s electrical system can help you troubleshoot and fix common problems more effectively.

In this article, we’ll guide you through the steps to fix some of the most common electrical issues you might encounter at home. We’ll cover how to identify and reset tripped circuit breakers, fix loose electrical outlets, replace faulty light switches, and safely address overloaded circuits. With these tips, you can tackle everyday electrical problems safely and efficiently.

Identifying and Resetting Tripped Circuit Breakers

One of the most common electrical problems in homes is a tripped circuit breaker. A circuit breaker trips when it detects an overload or short circuit, cutting off the electrical flow to prevent damage and ensure safety. Identifying a tripped circuit breaker is usually straightforward. First, go to your electrical panel, which is often located in the basement, garage, or utility room. Look for a breaker that is in the “off” position or one that stands out from the others, as it may be slightly misaligned.

To reset a tripped circuit breaker, follow these steps:

1. Turn Off All Connected Devices: Before resetting the breaker, turn off or unplug all devices connected to the tripped circuit to avoid another trip.

2. Locate the Tripped Breaker: Find the breaker that is out of alignment or in the “off” position.

3. Flip the Breaker Off, Then On: Push the breaker fully to the “off” position and then back to the “on” position. You should hear a click as it resets.

If the breaker trips again immediately, there may be a more serious issue at hand, such as a short circuit or ground fault. In such cases, it’s best to call a professional for further inspection to ensure there are no underlying problems that could pose a safety risk.

Fixing Loose Electrical Outlets

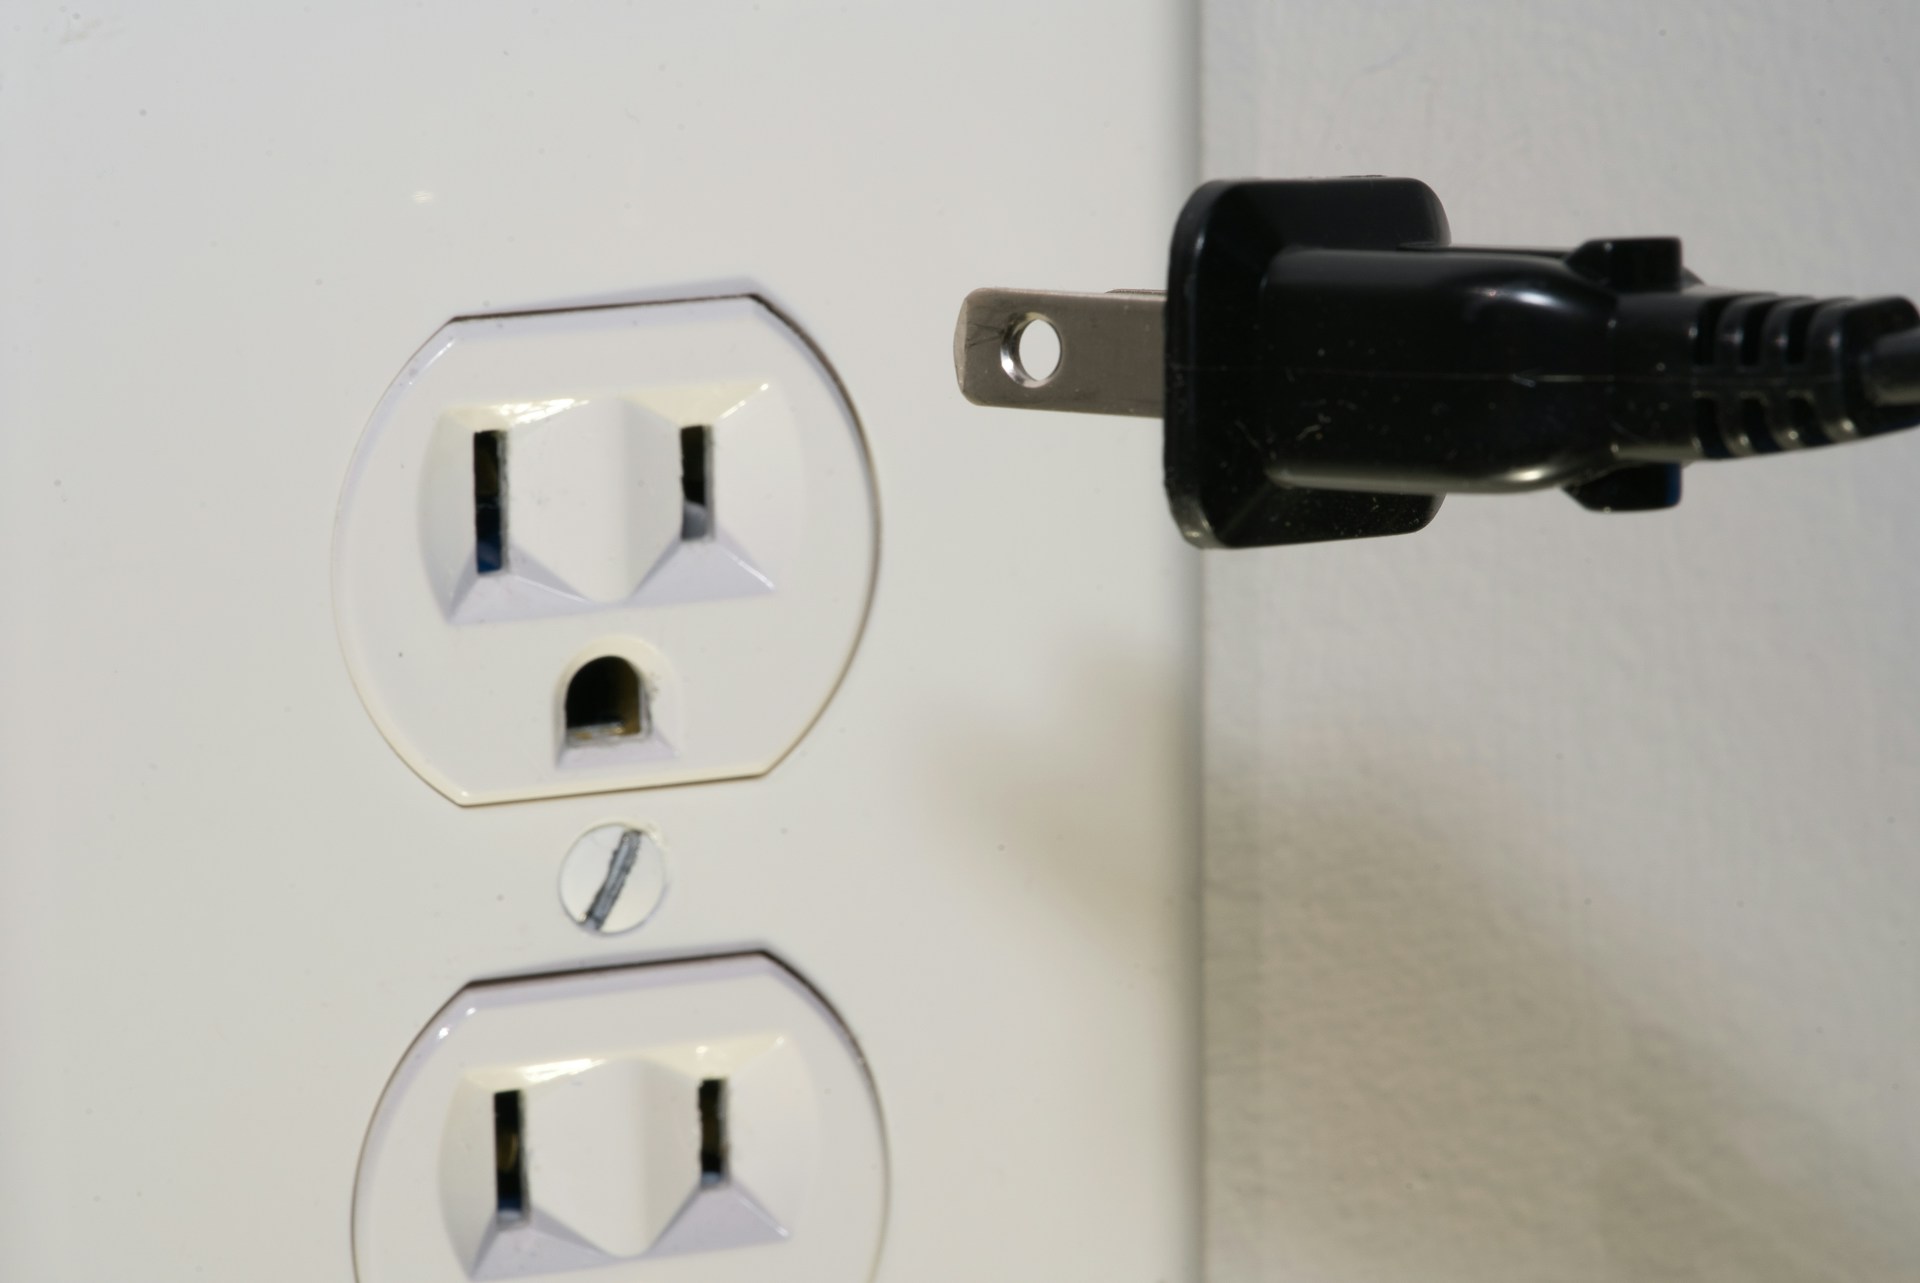
Loose electrical outlets are another common issue that can be both annoying and dangerous. A loose outlet can create a fire hazard due to poor contact between the plug and the outlet. Over time, this poor contact can cause arcing, which produces heat and can ignite surrounding materials. Fixing a loose outlet is a simple task that requires minimal tools.

Here’s how to fix a loose electrical outlet:

1. Turn Off Power: Always start by turning off the power to the outlet at the main circuit breaker to ensure your safety.

2. Remove the Outlet Cover: Use a screwdriver to remove the screws holding the outlet cover in place, and then remove the cover.

3. Tighten the Screws: Check the mounting screws that hold the outlet in place. If they are loose, tighten them with a screwdriver. Sometimes, the electrical box itself may be loose. In that case, gently tighten the screws that secure the box to the wall.

4. Add Shims if Necessary: If the outlet is still loose, you can use outlet shims or small washers to fill any gaps between the outlet and the electrical box, ensuring a snug fit.

5. Replace the Outlet Cover: Once everything is secure, replace the outlet cover and turn the power back on.

Fixing loose outlets not only improves safety but also makes it easier to plug in devices without the outlet moving. Following these simple steps can help you address this common issue quickly and effectively.

Replacing Faulty Light Switches

A faulty light switch can be frustrating and may pose a safety risk. Common symptoms of a faulty switch include flickering lights, the switch feeling warm to the touch, or a buzzing sound when you turn it on. If you experience any of these issues, replacing the light switch is a good idea.

Here’s how to replace a faulty light switch safely:

1. Turn Off Power: Turn off the power to the switch at the main circuit breaker.

2. Remove the Switch Plate: Use a screwdriver to take off the cover plate. Then, unscrew the mounting screws that hold the switch in place.

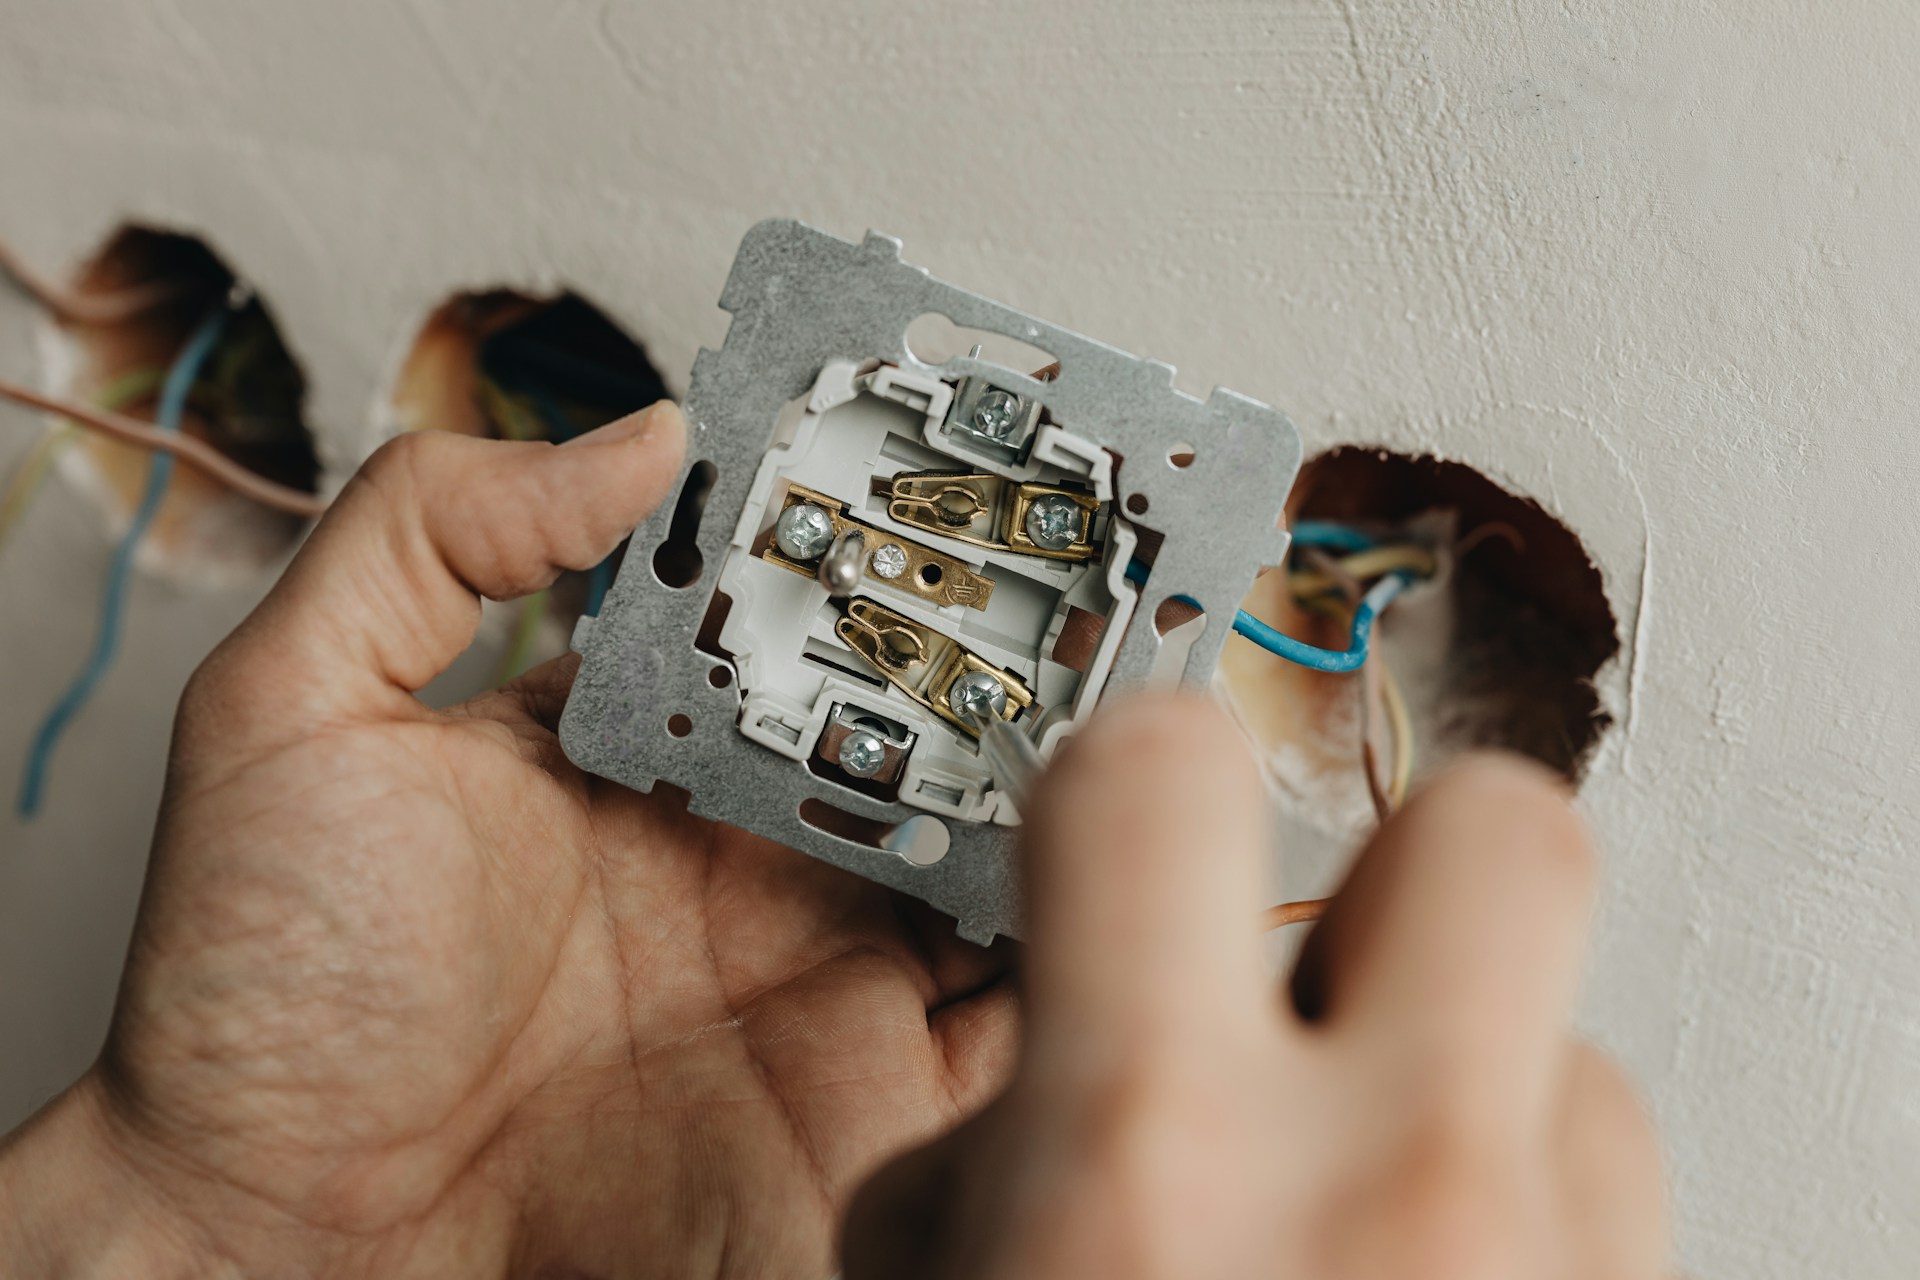
3. Inspect Wiring: Carefully pull the switch out of the electrical box and inspect the wiring. Note where each wire is connected so you can attach them to the new switch in the same way.

4. Remove the Old Switch: Disconnect the wires from the old switch. You may need a screwdriver to loosen the screws or pliers to pull the wires off.

5. Install the New Switch: Connect the wires to the new switch, following the same configuration as the old one. Tighten the screws to secure the wires.

6. Reattach the Switch and Cover Plate: Place the new switch into the electrical box, screw it in place, and reattach the cover plate.

7. Restore Power: Turn the power back on at the circuit breaker and test the new switch to ensure it works correctly.

Replacing a faulty light switch is a straightforward process that improves safety and restores proper function to your lighting system. Always remember to follow safety precautions when working with electricity.

Safely Addressing Overloaded Circuits

An overloaded circuit occurs when too many electrical devices are connected to a single circuit, exceeding its capacity. This can trip the circuit breaker or even cause electrical fires. Recognizing and addressing overloaded circuits is essential for home safety.

To safely address an overloaded circuit, follow these steps:

1. Identify the Overloaded Circuit: Pay attention to which circuit breaker trips frequently. This indicates that the connected circuit is likely overloaded.

2. List Connected Devices: Make a list of all devices connected to the problematic circuit.

3. Redistribute Electrical Load: Unplug some devices and distribute them across other circuits if possible. Avoid using extension cords as a long-term solution.

4. Upgrade Your Electrical System: If redistributing the load doesn’t solve the problem, consider upgrading your electrical system. This may involve adding more circuits or upgrading your breaker panel to handle a higher load.

5. Install Dedicated Circuits: For high-energy appliances like HVAC systems or electric dryers, installing dedicated circuits can prevent overloading and ensure safe operation.

Addressing overloaded circuits ensures that your electrical system operates safely and efficiently. By managing the electrical load, you can prevent frequent tripping and reduce the risk of electrical fires.

Final Thoughts

Understanding how to fix common electrical problems safely can empower you to maintain a safe and functional home. Whether you’re resetting tripped circuit breakers, fixing loose electrical outlets, replacing faulty light switches, or addressing overloaded circuits, proper knowledge and precautions are key. Following these guidelines can keep you and your family safe from potential electrical hazards.

While many electrical issues can be fixed with basic tools and a careful approach, some problems require professional expertise. When in doubt, it’s always best to consult a qualified electrician to ensure the safety and reliability of your electrical system.

For those who are more comfortable seeking professional help or have more complex electrical needs, don’t hesitate to reach out. Contact Turner On Services for expert electrical repair and services. Our team is ready to assist you with all your electrical needs and ensure your home remains safe and efficient.

Innovative Electrical Upgrades That Boost Your Home’s Value

electrical system upgrade

Electric upgrades are more than just a necessity for troubleshooting issues—they are a strategic investment in the modernization and enhancement of your home. As technology advances, the integration of sophisticated electrical systems not only meets the increasing demands for efficiency and safety but also significantly boosts the value of properties. Whether for comfort, convenience, or compliance with current standards, these upgrades are crucial.

We understand the importance of staying updated with the latest technologies in the electrical and HVAC fields. The perfect merge of functionality and innovation in electrical upgrades is not only about installing new systems. It’s about enhancing the way we live, offering a seamless blend of convenience and increased efficiency. By incorporating state-of-the-art electrical improvements, homeowners gain the dual benefit of enjoying current technology while augmenting the financial valuation of their property.

Join us as we explore various electrical upgrades that not only promise modernity and safety but ensure a smart investment that contributes to elevating your home’s market standing.

Understanding the Value of Electrical Upgrades in Modern Homes

In today’s smart and eco-conscious world, maintaining a modern home goes beyond cosmetic updates and extends into crucial systems like electrical upgrades. We have observed that many homeowners are initially hesitant about the need for these updates until they realize the profound impact on both their lifestyle and safety.

Electrical upgrades can significantly enhance the functionality and efficiency of your home, ensuring it meets current safety standards and accommodates the latest technological advancements. From upgraded wiring that supports more significant loads to modern circuit breakers that prevent overloading, these improvements form the backbone of a safe, functional, and future-ready home environment. This proactive approach not only addresses the immediate needs but also prepares your home for future innovations.

Key Electrical Upgrades That Enhance Home Value

Making informed decisions about which electrical upgrades to implement can substantially increase the value of your home. Here are some critical upgrades that we recommend:

1. Panel Upgrade: Replacing an outdated fuse box with a modern circuit breaker panel can significantly improve your home’s electrical capacity and safety, making it a highly appealing feature for potential buyers.

2. Surge Protection: Integrating whole-home surge protectors protects your expensive appliances and electronics from voltage spikes, demonstrating a well-maintained and secure home environment.

3. Energy-Efficient Lighting: Switching to LED lighting solutions not only reduces the energy bills but also enhances the ambiance and appeal of your home, boosting its market value.

4. Outdoor Lighting: Installing smart and energy-efficient outdoor lighting systems can improve the aesthetics of your property, increase security, and elevate the overall property appeal to prospective buyers.

By focusing on these strategic upgrades, we help homeowners not only improve their living experience but also boost their home’s market value, ensuring that every investment in your property’s electrical system pays dividends in comfort, safety, and resale value.

Implementing Smart Home Technologies for Increased Property Worth

As the world moves swiftly towards automation, incorporating smart home technologies into your property can be a transformative move to boost its value and appeal. Smart home technologies not only offer convenience and efficiency but also signify a modernized home that aligns with future living standards. We focus on integrating systems that control lighting, security, temperature, and even appliances through digital interactions, making daily routines much easier. An example of this is installing smart thermostats that adapt to your temperature preferences without constant manual adjustment, improving energy efficiency and household comfort.

Moreover, the integration of smart security systems that can be monitored from a smartphone offers homeowners peace of mind, an invaluable addition that prospective buyers find highly attractive. These systems provide real-time alerts and can detect potential issues before they become serious, adding a level of security that traditional systems cannot match. Our approach ensures that these technologies are not only seamlessly integrated into your existing electrical systems but also configured to bring out the best in functionality and ease of use, significantly enhancing your property’s marketability and living experience.

Maintaining and Safeguarding Your Electrical Investments

Ongoing maintenance is essential to preserving the integrity and functionality of new technological installations in your home. Regular checks and updates ensure that all systems operate at peak efficiency and are free from potential malfunctions that could lead to larger issues. Our team is committed to providing thorough inspections and maintenance services for all electrical and smart technology systems. This commitment ensures that every installation remains safe and functional long after installation, protecting your investment and continuing to enhance the value of your home.

Furthermore, we emphasize the importance of safeguarding these investments through tailored advice on managing and operating your new systems. From understanding the basics of system upkeep to receiving tips on optimizing system settings for energy savings, we support you every step of the way. Our goal is to ensure that these enhancements contribute effectively to your home’s value without creating additional burdens or risks.

Final Thoughts

It’s clear how vital electrical upgrades and smart technology integrations are to maintaining a modern, efficient, and highly desirable home. Not only do these investments increase the immediate usability and safety of your living environment, but they also offer long-term benefits by boosting your home’s appeal and market value.

Whether it’s through the intelligent use of smart home technologies or the strategic upgrading of your electrical systems, the approach should be comprehensive and well-informed. Remember, these improvements are not just renovations; they are investments in the future of your property.

If you’re ready to take your home into the future and elevate its value, contact us at Turner On Services. Let us help you make smart decisions that keep your home at the forefront of both technology and comfort. Trust us to deliver expertise and quality electrical service panel upgrades that you can depend on.

Fixing Simple Electrical Problems at Home

electrical repair

Electrical problems at home can be a real headache, but not all of them require a professional to fix. Some issues are simple enough for you to handle on your own with a bit of guidance. Understanding how to tackle these common problems can save you time and money while keeping your home safe.

From flickering lights to outlets that don’t work, small electrical issues can pop up from time to time. Knowing how to identify these problems is the first step in fixing them. It’s also essential to learn the basics of safely working with electricity to avoid any risks.

In this article, we’ll go over how to identify common electrical issues, safely reset a circuit breaker, replace a faulty outlet, and share tips for preventing electrical problems in the future. These steps will help you manage minor electrical repairs and keep your home’s electrical system in good shape. Let’s get started!

Identifying Common Electrical Issues

Before you can fix an electrical problem, you need to know what you’re dealing with. There are some common issues you might encounter at home. Being able to identify them quickly will help you decide whether you can handle the fix yourself or if you need a professional’s help.

One common issue is flickering lights. If your lights are flickering, it could be a sign of loose wiring or a problem with the light fixture itself. Check if the bulb is securely screwed in. If that doesn’t work, you might need to inspect the wiring for any loose connections.

Another frequent problem is outlets that don’t work. If an outlet isn’t providing power, check if it’s a GFCI outlet with a reset button. Press the reset button to see if power is restored. If that doesn’t work, you might have a tripped circuit breaker or a wiring issue.

Circuit breakers that trip often are another common problem. If you notice that your breaker trips frequently, your circuit might be overloaded. Unplug some devices and see if that solves the problem. If it doesn’t, you might need to investigate further or contact a professional.

How to Safely Reset a Circuit Breaker

Resetting a circuit breaker is one of the simplest electrical fixes you can do at home. Before you start, make sure your hands are dry, and you’re standing on a dry surface to avoid any electrical shock.

First, locate your electrical panel. It’s usually found in the basement, garage, or utility room. Open the panel door to see the breakers inside. The tripped breaker will be in the “off” position or somewhere between “on” and “off”. Identify which breaker is tripped.

Next, turn the tripped breaker to the “off” position. This step ensures the breaker is fully reset. After turning it off, flip the breaker back to the “on” position. You should hear a click when it’s securely in place. Check if the power is restored to the areas affected by the tripped breaker.

If the breaker trips again immediately, you likely have an ongoing issue such as an overload or a short circuit. In this case, unplug some devices and reset the breaker again. If it continues to trip, it’s a good idea to call a professional to inspect your electrical system. This way, you can address the underlying problem safely and effectively.

Replacing a Faulty Electrical Outlet

Replacing a faulty electrical outlet might sound daunting, but it’s a task you can handle with some basic tools and safety precautions. Before you start, make sure to turn off the power to the outlet at the circuit breaker. Use a voltage tester to confirm there’s no electricity flowing to the outlet.

Step 1: Remove the faceplate and outlet. Use a screwdriver to take off the faceplate. Then unscrew the outlet from the electrical box and gently pull it out. You’ll see wires connected to the outlet.

Step 2: Note the wire connections. Typically, you’ll find black (hot), white (neutral), and green or bare (ground) wires. Take a picture or make a note of how the wires are connected before you disconnect them.

Step 3: Disconnect and reconnect the wires. Loosen the screws holding the wires in place and disconnect them. Take your new outlet and attach the wires in the same way they were connected to the old one. Tighten the screws to secure the wires.

Step 4: Install the new outlet. Carefully push the wires back into the electrical box and screw the new outlet in place. Attach the faceplate, turn the power back on, and test the outlet to ensure it’s working.

Tips for Preventing Electrical Problems

Preventing electrical problems is always better than dealing with them after they occur. Here are some practical tips to help you keep your home’s electrical system in good shape:

1. Regular Inspections: Schedule regular electrical inspections to catch potential issues early. Look for signs of wear and tear on wires, outlets, and switches.

2. Replace Old Wiring: If your home’s wiring is old or outdated, consider updating it. Faulty wiring is a common cause of electrical fires.

3. Avoid Overloading Circuits: Be mindful of how many devices you plug into a single outlet. Overloading circuits can cause breakers to trip and even lead to fires. Use power strips with surge protectors to manage multiple devices.

4. Use Appliances Safely: Follow the manufacturer’s guidelines for using appliances. Avoid using damaged or frayed cords, and unplug appliances when not in use.

5. Install GFCI Outlets: Ground Fault Circuit Interrupter (GFCI) outlets are designed to prevent electrical shock. They are especially important in areas with water, like kitchens and bathrooms.

6. Educate Your Family: Teach your family about electrical safety, such as not yanking cords out of outlets and not using electronics near water.

Conclusion

Dealing with electrical problems at home doesn’t have to be daunting. By identifying common issues, safely resetting circuit breakers, and replacing faulty outlets, you can handle many problems yourself. Taking preventative measures can also help you avoid future issues and keep your home safe.

Remember, while DIY fixes are great for simple problems, some electrical issues require a professional touch. If you’re ever unsure or dealing with complex problems, it’s best to call in an expert.

For any electrical needs or regular maintenance, Turner On Electric is here to help. Contact our Milford electricians today to ensure your home’s electrical system is safe and efficient. Your family’s safety is our top priority. Call Turner On Electric for a reliable service you can trust!

How to Cut Down on Your Cooling Costs

cooling cost

Keeping cool during the hot summer months can be expensive, but it doesn’t have to break the bank. You can take several steps to reduce your cooling costs without sacrificing comfort. By making some smart changes around your home, you can stay cool and save money at the same time.

One of the simplest ways to cut down on cooling costs is by managing your thermostat settings wisely. A programmable thermostat can help you set temperatures that change according to your daily routines, ensuring your AC isn’t running when you don’t need it.

Another effective strategy is improving your home’s insulation. Good insulation keeps the cool air inside and the hot air out, making your air conditioner’s job easier. Regular HVAC maintenance is also key to an efficient system. An optimized system runs better, uses less energy, and prevents costly breakdowns.

In this article, we will explore these tips in detail and share some energy-efficient cooling practices that can help you beat the heat while keeping your utility bills down. Let’s dive in and start saving on your cooling costs!

Install a Programmable Thermostat

One of the easiest ways to reduce your cooling costs is by installing a programmable thermostat. A programmable thermostat allows you to set different temperatures for different times of the day. This way, you can automatically adjust the cooling when you don’t need it. For example, you can set the temperature higher when you’re not at home and lower it just before you come back. This ensures that you’re not wasting energy cooling an empty house.

Using a programmable thermostat also makes it easier to establish cooling schedules that align with your daily routine. For instance, while you are asleep, you can set the temperature a few degrees higher, saving more energy. The thermostat will then lower the temperature just before you wake up, making it comfortable.

Many programmable thermostats even come with smart features that let you control them remotely through your phone. This gives you even more flexibility and potential for energy savings. If your plans change and you’re going to be home later than expected, you can easily adjust the settings from your phone, ensuring you only use cooling when needed.

Improve Your Home’s Insulation

Another effective way to cut down on cooling costs is by improving your home’s insulation. Good insulation acts as a barrier that keeps the cool air inside and the hot air outside, reducing the workload on your air conditioner.

Start by checking the insulation in your attic, as this is where much of the heat enters your home. Adding new insulation or replacing old, ineffective materials can make a significant difference. You should also inspect the walls and floors, as proper insulation in these areas helps maintain a steady indoor temperature.

Sealing any gaps or cracks around windows and doors is equally important. Use weather stripping or caulk to seal these openings. This prevents warm air from sneaking in and cool air from escaping. Even small gaps can lead to significant energy loss, so it’s worth taking the time to seal them properly.

Additionally, consider using thermal curtains or blinds. These window coverings help block out heat from the sun during the day, further reducing the strain on your air conditioning system. By improving your home’s insulation, you can create a more energy-efficient environment while keeping your cooling costs low.

Regularly Maintain Your HVAC System

Keeping your HVAC system well-maintained is crucial for reducing cooling costs. A well-maintained system runs more efficiently, uses less energy, and can even help prevent costly breakdowns.

Start by changing your air filters regularly. Dirty or clogged filters force your air conditioner to work harder, consuming more energy. Aim to check your filters once a month and replace them every 1 to 3 months, depending on the type and usage.

Another essential maintenance task is cleaning the outdoor unit. Over time, the outdoor condenser unit can get clogged with dirt, leaves, and debris, blocking airflow and reducing efficiency. Turn off the power and use a garden hose to gently clean the fins and remove debris.

Scheduling a professional HVAC tune-up at least once a year is also a good idea. A technician will inspect your system, checking for any potential issues and ensuring that everything is running smoothly. Regular maintenance helps extend the lifespan of your HVAC system and keeps it operating at peak efficiency.

Use Energy-Efficient Cooling Practices

Using energy-efficient cooling practices can make a big difference in your monthly utility bills. Here are some practical tips to help you save energy while keeping your home comfortable:

1. Ceiling Fans: Use ceiling fans to circulate air and create a wind-chill effect, making it feel cooler. This allows you to set the thermostat a few degrees higher without sacrificing comfort.

2. Close Blinds and Curtains: During the hottest parts of the day, close blinds and curtains to block out the sun’s rays. This helps keep your home cooler and reduces the need for air conditioning.

3. Avoid Heat-Generating Activities: Try to avoid using heat-generating appliances like ovens and dryers during the hottest parts of the day. Instead, cook meals during the cooler hours or use a microwave.

4. Ventilation: Use natural ventilation during the cooler parts of the day. Open windows and doors to let in cool air and create cross-ventilation, reducing the need for air conditioning.

5. Seal Air Leaks: Check for and seal air leaks around windows, doors, and ducts to prevent cool air from escaping and warm air from entering.

6. Thermostat Settings: Set your thermostat to the highest comfortable temperature. Each degree you raise the thermostat can result in significant energy savings.

Conclusion

Cutting down on cooling costs doesn’t have to be complicated. By installing a programmable thermostat, improving your home’s insulation, regularly maintaining your HVAC system, and adopting energy-efficient cooling practices, you can make a real difference in your energy bills.

Remember, the key to saving money is consistency. Making these changes and maintaining them over time will yield the best results. If you ever need more help or want to ensure your system is running as efficiently as possible, Turner On Electric is here to help.

For expert advice and top-notch service, contact Turner On Electric today. We’re your trusted HVAC specialists and electricians in Milford, ready to help you save money and stay comfortable all year long. Call Turner On Electric now and start enjoying lower cooling costs and better indoor comfort!

Safety Tips for Using Electrical Devices at Home

Electrical Devices

Electricity is a vital part of our daily lives, powering everything from our kitchen appliances to our entertainment systems. However, using electrical devices improperly can lead to accidents, injuries, and even fires. That’s why it’s crucial to follow safety guidelines when using these devices at home.

Being mindful of how you use electrical devices can prevent many common household hazards. For example, using devices as intended and according to the manufacturer’s instructions can go a long way in avoiding mishaps. Simple actions, like keeping appliances dry and unplugging them when not in use, can significantly enhance safety.

Another critical aspect is the condition of your electrical setup, from outlets to cords and power strips. Overloading outlets or using damaged cords can increase the risk of electrical fires. Regular inspections and maintenance can help you catch potential issues before they become serious problems.

By understanding and implementing these safety tips, you can create a safer environment for everyone in your home. Keeping your electrical system well-maintained and using devices responsibly will not only protect your property but also provide peace of mind.

Use Electrical Devices Properly

Using electrical devices properly is essential for preventing accidents and ensuring safety at home. Always read and follow the manufacturer’s instructions for each device. These guidelines provide important information about safe operating practices and proper usage. For instance, avoid using kitchen appliances near water to prevent electric shocks, and never touch electrical devices with wet hands.

Another important tip is to unplug devices when they are not in use. This not only saves energy but also reduces the risk of electrical fires. Many devices consume power even when turned off, and unplugging them can prevent them from overheating. For bigger appliances that can’t be unplugged regularly, make sure they are placed in well-ventilated areas to avoid overheating.

Never force plugs into outlets if they don’t fit easily. This can damage both the plug and the outlet, creating a fire hazard. If you have young children, use outlet covers to prevent them from inserting objects into outlets. By using electrical devices correctly, you can enhance the safety of your home significantly.

Avoid Overloading Outlets and Power Strips

Overloading outlets and power strips is a common cause of electrical fires. Each outlet and power strip has a maximum load capacity, which should never be exceeded. Plugging too many devices into a single outlet can cause it to overheat, potentially leading to a fire.

To avoid overloading, distribute appliances and electronic devices across multiple outlets. Use power strips with built-in circuit breakers, which automatically shut off if the strip becomes overloaded. This added layer of protection can prevent overheating and potential fires.

When using power strips, ensure they are not daisy-chained together. Connecting multiple power strips to each other increases the risk of overload. Also, be mindful of high-wattage devices like space heaters, microwaves, and air conditioners. These devices should be plugged directly into wall outlets rather than into power strips or extension cords.

Following these simple precautions can prevent overloads and keep your electrical system running safely. Regularly check your outlets and power strips for signs of wear or damage, and replace them as needed to maintain a safe environment.

Regularly Inspect and Maintain Electrical Cords

Regular inspections of electrical cords are essential to maintaining a safe home environment. Worn or frayed cords can pose significant hazards, including electric shocks and fire risks. Make it a habit to check all cords periodically for any signs of damage. Cords that are cracked, frayed, or showing exposed wires need immediate replacement.

Using electrical tape as a temporary fix may seem convenient, but it’s not a safe long-term solution. Always replace damaged cords with new ones to ensure safety. Additionally, avoid running cords under carpets or rugs. This can cause them to overheat and lead to a fire. Keep cords away from high-traffic areas where they may get stepped on or damaged.

Another key tip is to handle cords properly when unplugging devices. Pulling on the cord itself can cause damage, so always pull from the plug. Secure cords to prevent pets or small children from chewing on them. By maintaining your electrical cords, you can prevent many common electrical issues and maintain a safe home.

Install and Test Safety Devices

Installing and regularly testing safety devices is a critical step in safeguarding your home from electrical hazards. Ground Fault Circuit Interrupters (GFCIs) and Arc Fault Circuit Interrupters (AFCIs) are essential tools in this regard. GFCIs are particularly useful in areas with high moisture, such as bathrooms and kitchens, as they shut off the circuit if an imbalance in the current is detected.

Similarly, AFCIs protect your home from electrical fires by detecting arc faults, a common cause of fires. Installing these devices can prevent dangerous situations before they escalate. Make sure to test these safety devices monthly. GFCIs have a “Test” and “Reset” button for easy testing. Press the “Test” button to ensure the circuit trips, and then the “Reset” button to restore power.

Smoke detectors and carbon monoxide detectors are also vital safety devices. Check their batteries regularly and replace them at least once a year. Regular testing and maintenance of these devices ensure they are always ready to protect your home. By taking these steps, you enhance the overall safety of your electrical system.

Final Thoughts

Following these safety tips for using electrical devices at home can make a significant difference in preventing accidents and ensuring the well-being of your family. From using devices properly to installing and testing safety gadgets, each step contributes to a safer, more secure living environment.

Regular maintenance, such as inspecting electrical cords and avoiding overloaded outlets, not only keeps your home safe but also extends the life of your electrical systems. Safety devices like GFCIs, AFCIs, and smoke detectors add an extra layer of protection, reducing the risk of electrical fires and other hazards.

For more expert advice or assistance with electrical repairs and services, contact Turner On Electric. Our professional team is dedicated to providing top-quality electrical and HVAC solutions tailored to your needs. Call Turner On Electric today to schedule a consultation and ensure your home remains safe and efficient.

How to Safely Handle Electrical Outlets at Home

Electrical Outlet

Handling electrical outlets at home can seem daunting, especially if you’re not familiar with how they work. Electrical outlets are essential for powering your home’s devices and appliances, but they can also be a source of danger if not handled correctly. Ensuring that you know how to safely use and maintain them is crucial for preventing electrical accidents and keeping your home safe.

Many homeowners may not realize that different types of outlets serve different purposes. Understanding these differences can help you use them properly and select the right outlets for your home. Additionally, following essential safety tips when using electrical outlets can help you avoid common hazards such as electrical shocks, fires, and damage to your appliances.

Recognizing the signs of common electrical outlet problems and knowing how to address them can save you both time and money. While some minor fixes can be handled on your own, there are times when calling a professional electrician is necessary. Knowing when to seek professional help ensures that you address more significant issues safely and effectively. Let’s explore some key aspects of handling electrical outlets safely in your home.

Understanding Different Types of Electrical Outlets

Understanding the different types of electrical outlets is important for ensuring safety and functionality in your home. Each type of outlet is designed for specific uses and has unique features to meet various electrical needs. Knowing which outlet type to use can help prevent electrical issues and improve convenience.

Standard Outlets (15-Amp Duplex Receptacle): These are the most common outlets found in homes. They have two vertical slots and a grounding hole. These outlets are typically used for standard household appliances and electronics. They provide a safe connection for devices that do not require high power.

GFCI Outlets (Ground Fault Circuit Interrupter): GFCI outlets are essential for areas where water is present, such as kitchens, bathrooms, and outdoor spaces. These outlets protect against electrical shock by cutting off power if a ground fault or short circuit is detected. You can identify them by the “test” and “reset” buttons on the face of the outlet.

AFCI Outlets (Arc Fault Circuit Interrupter): AFCI outlets protect against electrical fires by detecting arc faults, which are high-power discharges that can cause fires. These outlets are commonly installed in bedrooms and living areas to enhance safety.

USB Outlets: USB outlets combine standard electrical receptacles with USB ports, allowing you to charge devices like smartphones and tablets directly from the wall outlet. This type of outlet helps reduce the need for bulky adapters and chargers.

20-Amp Outlets: These outlets have a horizontal slot in addition to the vertical ones and are designed for appliances that require more power, like large kitchen appliances and heavy-duty power tools. They ensure that high-power devices receive the electricity they need safely.

Safety Tips for Using Electrical Outlets

Using electrical outlets safely is crucial for preventing electrical hazards and ensuring the longevity of your home’s electrical system. Following these safety tips can help you avoid accidents and keep your home secure.

1. Inspect Outlets Regularly: Check your outlets regularly for signs of damage, such as cracks, discoloration, or loose connections. Damaged outlets can pose a risk of electrical fires and should be repaired or replaced immediately.

2. Avoid Overloading Outlets: Plugging too many devices into one outlet can cause overheating and increase the risk of a fire. Use power strips with surge protectors if you need more outlets, but make sure not to overload them.

3. Keep Outlets Dry: Never use electrical outlets near water or with wet hands. Install GFCI outlets in areas prone to moisture to prevent electrical shocks.

4. Childproof Your Outlets: If you have young children, consider installing tamper-resistant outlets or using outlet covers. These measures prevent children from inserting objects into the outlets and getting shocked.

5. Unplug Unused Devices: When not in use, unplug devices to reduce the risk of electrical fires and save energy. This practice also protects your electronics from power surges.

6. Use Proper Wattage: Ensure that light bulbs and other appliances are using the correct wattage for the outlets they are plugged into. Using the wrong wattage can cause overheating and damage the electrical system.

7. Avoid DIY Electrical Work: While it might be tempting to fix electrical issues yourself, it’s safer to call a professional. Incorrect repairs can lead to serious hazards.

By following these safety tips, you can minimize the risk of electrical problems and enjoy a safer home environment.

Common Electrical Outlet Problems and How to Fix Them

Electrical outlets can face various problems over time, and knowing how to identify and fix these issues can save you time and ensure safety.

Loose Outlets: If your outlet moves when you plug something in, it could cause a poor connection and spark a fire. To fix a loose outlet, first, turn off the power at the circuit breaker. Remove the outlet cover, and use a voltage tester to ensure the power is off. Tighten the screws holding the outlet in place and replace the cover.

Outlets Not Working: If an outlet is not working, it may be due to a tripped circuit breaker, a blown fuse, or a GFCI outlet that needs resetting. Check the circuit breaker panel for any tripped breakers and reset them. For GFCI outlets, press the “reset” button to restore power. If the outlet still doesn’t work, it could be a wiring issue that requires professional help.

Warm or Hot Outlets: An outlet that feels warm or hot to the touch is a sign of a serious problem, often caused by overloading or faulty wiring. Turn off the power to the outlet and avoid using it until a professional electrician can inspect and resolve the issue.

Cracked or Broken Outlets: Damaged outlets can expose wiring and increase the risk of electrical shocks and fires. Turn off the power, remove the damaged outlet, and replace it with a new one. Make sure to follow safety procedures or call a professional if you are unsure.

When to Call a Professional Electrician

While some minor electrical issues can be handled with basic tools and know-how, there are certain situations where calling a professional electrician is crucial to ensure safety and prevent further damage.

Frequent Circuit Breaker Trips: If your circuit breaker trips frequently, it could indicate an overloaded circuit, a short circuit, or a ground fault. A professional electrician can identify the root cause and make necessary repairs to prevent future issues.

Burning Smell: A burning smell coming from an outlet or your electrical panel is a serious sign of an electrical fire hazard. Turn off the power and call a professional electrician immediately to inspect and fix the problem.

Flickering or Dimming Lights: If your lights flicker or dim when you use certain appliances, it may indicate a problem with the electrical system. A professional can examine the wiring, circuits, and overall electrical load to ensure everything is functioning correctly.

New Installations or Upgrades: When adding new appliances, outlets, or upgrading your electrical panel, it’s best to leave the work to a licensed electrician. They ensure the work meets local codes and standards, providing safety and reliability.

Persistent Electrical Issues: If you experience ongoing electrical problems despite DIY attempts, it’s time to call in a professional. They have the expertise to diagnose complex issues and provide lasting solutions.

Renovations or Major Repairs: For any major renovations or electrical overhauls, professional electricians ensure the work is done to code and safely. They handle permits and inspections necessary for compliance with local regulations.

Final Thoughts

Understanding and maintaining your electrical outlets is essential for a safe and functional home. By recognizing the different types of outlets, following safety tips, and troubleshooting common problems, you can prevent many electrical hazards. However, it’s crucial to know when to call a professional electrician for more complex issues.

Taking proactive steps to ensure the safety and efficiency of your home’s electrical system can save you time, money, and stress in the long run. Regular inspections and timely repairs can prevent minor issues from becoming major problems, keeping your home safe and comfortable.

For professional electrical services, don’t hesitate to contact Turner On Electric. Our team of skilled electricians in Cincinnati, Ohio, is ready to assist you with all your electrical needs, from minor repairs to major installations. Ensure your home’s electrical system is in top shape by scheduling an appointment with Turner On Electric today.

Choosing Safe Electrical Products for Kids

Electrical Products for Kids

Keeping children safe at home is a top priority for any parent, especially regarding electrical products. Kids are naturally curious and may not understand the dangers associated with electricity. That’s why it is crucial to pick electrical products specifically designed with their safety in mind. Ensuring your home is equipped with child-safe electrical items can prevent accidents and give you peace of mind.

Electrical products come with various safety standards to protect users, but when children are involved, these standards become even more critical. By understanding what to look for in child-safe electrical products, you can make better choices for your home and reduce the risk of electrical repair.

This article will explore how to identify safe electrical products for kids. We will discuss the importance of understanding electrical safety standards, essential features to look for, common household electrical hazards, and tips for teaching kids about electrical safety. With this information, you can create a safer home environment for your family and help your children develop good habits around electricity.

Understanding Electrical Safety Standards for Kids

Understanding electrical safety standards is crucial when choosing products for children. These standards ensure that electrical items are safe for household use, especially where kids are present. In the United States, many electrical products must meet guidelines set by organizations like the Underwriters Laboratories (UL) or the Consumer Product Safety Commission (CPSC).

Look for product labels indicating these organizations have tested and certified them. A UL mark, for instance, means the product meets strict safety requirements and has undergone rigorous testing. Additionally, the CPSC regularly reviews and updates safety regulations for electrical products, ensuring they are safe for everyday use.

International safety marks can also be vital if you are purchasing imported products. Knowing these marks and what they represent can help you make informed choices. Safety certifications are essential because they cover aspects like fire resistance, protection from electric shocks, and durability under normal usage conditions.

Essential Features to Look for in Child-Safe Electrical Products

When choosing electrical products for homes with kids, focus on features specifically designed for safety. The following features are essential to consider:

1. Tamper-Resistant Receptacles (TRRs): These outlets prevent children from inserting objects into the slots, reducing the risk of electric shock.

2. Cord Shorteners: Loose cords present a tripping hazard and can be pulled by curious children. Cord shorteners keep cords organized and out of reach.

3. Outlet Covers and Plates: Use covers that slide over the outlet when not in use or plates that screw into the outlet to prevent access.

4. Surge Protectors with Safety Covers: Choose surge protectors with built-in safety covers that slide over unused outlets.

5. Ground Fault Circuit Interrupters (GFCIs): These devices shut off the electricity when an imbalance or fault is detected, reducing the risk of electric shock. Install them in areas where water is present, like bathrooms and kitchens.

6. Child-Proof Power Strips: These power strips are designed to be difficult for children to open but convenient for adults.

Selecting electrical products with these features can significantly enhance the safety of your home. Always read product reviews and consult recommendations to ensure they meet high safety standards. This small step can prevent potential electric repairs and keep children safe from electrical dangers.

Common Household Electrical Hazards and How to Prevent Them

Understanding and preventing household electrical hazards is key to ensuring children’s safety. One common hazard is overloaded circuits. Plugging too many devices into a single outlet can cause overheating, leading to fires. To avoid this, use power strips with built-in circuit breakers and never daisy-chain multiple strips together.

Frayed or damaged cords are another hazard. These can expose wires and create shock or fire risks. Regularly inspect cords for wear and tear, and replace any that show signs of damage. Teach kids not to pull on cords or play with them to prevent further damage.

Water and electricity are a dangerous combination. Ensure electrical devices are kept away from water sources. Use Ground Fault Circuit Interrupters (GFCIs) in moisture-prone areas, such as bathrooms and kitchens. These devices instantly cut off power if they detect a ground fault, reducing the risk of shock.

Lastly, ensure that outlets are adequately covered and unused outlets have safety plugs. This simple step prevents children from inserting objects into outlets, which can cause electric shock.

Tips for Teaching Kids About Electrical Safety

Teaching kids about electrical safety is vital for their well-being. Start with simple rules like not touching electrical outlets or cords. Explain that electricity is powerful and can be dangerous if not used correctly. Use clear and simple language so they understand.

Setting an example is an excellent way to teach. Always practice safe behaviors around electricity, such as turning off appliances when not in use and keeping electronics away from water. Children are more likely to follow these practices if they see adults doing the same.

Interactive tools, like safety videos and educational games, can also help kids grasp electrical safety concepts. Making the learning process engaging and fun ensures they retain the information better. Reinforce these lessons regularly to keep safety in your children’s minds.

Conclusion

Ensuring your home is safe for kids involves understanding and implementing robust electrical safety measures. Recognizing common household hazards, incorporating safety features in your electrical products, and educating your children are all vital steps in creating a secure environment.

Taking proactive measures, such as inspecting cords, using GFCIs, and installing tamper-resistant outlets, can significantly reduce the risk of electrical accidents. Additionally, it’s important to regularly engage children in safety conversations to make them aware of electricity’s dangers and how to avoid them.

If you need assistance enhancing your home’s electrical safety or require electrical repair, Turner On Electric is here to help. Our team of experts can guide you in selecting the safest electrical products and ensuring your home’s electrical system is up to date. Contact Turner On Electric today to create a safer home for you and your family.

Top Safety Protocols for Electrical Repairs: A Guide by Our Experts

electrical repair

Electrical safety is paramount, whether you’re flipping a light switch or rewiring a home. At our core, we prioritize the safety and well-being of our clients and their families, which is why we emphasize the importance of understanding and implementing safe electrical repair practices. Handling electrical components can be daunting and dangerous without the proper knowledge and tools. It’s not just about preventing injuries; it’s about creating a secure environment that guards against potential electrical hazards.

In our daily operations, we encounter a variety of electrical systems—some old and dated, others modern and complex. This diversity requires a deep understanding of electrical safety fundamentals to ensure that every repair or installation is performed without risk. Moreover, using the correct tools and equipment is not just a recommendation; it is a necessity for safeguarding your home and our team. In the following sections, we will delve into essential safety protocols and the significance of using appropriate tools during electrical repairs. Our goal is to empower homeowners with knowledge while highlighting how our professional services incorporate stringent safety standards to handle every electrical challenge efficiently and safely.

Understanding the Basics of Electrical Safety

Electrical safety is a foundational aspect of our services, and it starts with a clear understanding of how electricity behaves and the inherent risks involved. Electrocution, electrical fires, and other hazards can occur if electrical systems are not handled correctly. That’s why we place a strong emphasis on education, both within our team and with our clients. We ensure that everyone working on or around electrical systems knows the principles of electricity, including the flow of electrical current and the role of grounding in safety.

Another critical element of electrical safety is recognizing the warning signs of potential electrical problems. These can include frequent circuit breaker trips, flickering lights, and unusual buzzing or sizzling sounds from electrical devices. By teaching these fundamentals, we empower our clients to identify issues early, which can prevent severe accidents and system failures.

Essential Tools and Equipment for Safe Electrical Repairs

High-quality, well-maintained tools and the correct personal protective equipment (PPE) are essential for performing safe electrical repairs. Here’s a look at some of the crucial tools and equipment we always use:

1. Insulated Tools: All our hand tools are insulated to protect against electrical shocks. This includes screwdrivers, pliers, wire strippers, and cutters. Each tool is specifically designed to prevent the conduction of electricity, offering an additional layer of safety.

2. Voltage Tester: Before we begin any repair, we use a voltage tester to confirm that the circuit is de-energized. This tool is vital for preventing accidental electrocution by ensuring that there are no live wires.

3. Wire Insulation: Proper wire insulation is mandatory for preventing short circuits and other electrical mishaps. We always check for any compromised insulation and replace it immediately during repairs.

4. Safety Glasses and Gloves: Our team wears safety glasses to protect their eyes from sparks and flying debris. Similarly, insulated gloves are worn at all times to prevent electric shocks.

By employing these tools and following stringent safety protocols, we ensure that every electrical job is done safely and effectively, protecting both our team and our clients’ property from potential harm.

Step-by-Step Safety Procedures for Common Electrical Repairs

When conducting electrical repairs, strict procedures are crucial for ensuring everyone’s safety. We adhere to a step-by-step process that begins with a careful assessment of the electrical issue. First, we disconnect the power source, ensuring that no current flows through the circuit while work is performed. Then, we use our advanced testing equipment to check for any live wires before proceeding, even if the power is assumed to be disconnected. This precaution helps prevent any accidental electrocution or short circuits.

Next, we methodically replace or repair any faulty components. Every step in our repair process is double-checked for accuracy. We always ensure that all connections are secure and that new installations comply with current electrical codes and safety standards. After the repairs, we conduct a thorough testing phase to ensure everything operates perfectly under normal conditions, preventing any future hazards from hidden faults.

How We Ensure Safety During Professional Electrical Services

Safety is not just a part of our service; it’s the backbone of everything we do. During every repair, installation, or maintenance job, we follow a stringent set of safety protocols that meet or exceed industry standards. Our technicians receive ongoing training in the latest safety practices and electrical codes. This continuous education ensures that they are knowledgeable about the safest techniques and newest safety equipment.

Moreover, we conduct regular safety audits where our procedures and equipment are reviewed and updated if necessary. These audits help us identify any potential risks or areas for improvement in our services. By maintaining a proactive approach to safety, we ensure that our team is always prepared to deliver safe, high-quality workmanship.

Conclusion

The importance of electrical safety cannot be overstressed. At Turner On Electric, our commitment to maintaining the highest safety standards is an integral part of our promise to you. We provide not only expert electrical and HVAC services but also the peace of mind that everything is done safely and proficiently. Whether you need a routine assessment or an emergency repair, you can trust us to deliver with your safety as our primary concern.

For all your electrical and HVAC needs, remember that our team of OH electricians at Turner On Electric is just a call away. We are dedicated to serving the Cincinnati community with integrity and excellence. Contact us today to ensure your home’s systems are safe and efficient. Let us take care of your electrical and HVAC needs while you enjoy undisturbed comfort and safety at home.

How to Fix Common Electrical Problems in Your House

electrical panel repair

Home electrical problems can be both frustrating and dangerous if not handled properly. Whether it’s flickering lights, faulty outlets, or tripping circuit breakers, these issues can disrupt your daily life and pose safety risks. Understanding how to fix common electrical problems can save you time and money, and give you peace of mind knowing that your home is safe.

Understanding Electrical System Basics

Understanding the basics of your home’s electrical system is the first step to tackling any electrical problems. Your home’s electrical system consists of several components, including the electrical panel, outlets, switches, and wiring. Knowing how these elements work together helps you identify issues and address them safely.

The electrical panel, often called the breaker box, is the heart of your home’s electrical system. It distributes electricity from the main power line to different circuits throughout your house. Each circuit is protected by a circuit breaker, which shuts off power when it detects an overload or short circuit. Familiarize yourself with the location of your electrical panel and how to reset breakers.

Outlets and switches are the most accessible parts of your electrical system. Outlets receive electrical connections for devices, while switches control the flow of electricity to light fixtures and other appliances. Regularly check these components for signs of wear or damage, such as discoloration, buzzing sounds, or loose connections.

Wiring is another critical element. It carries electricity from the panel to outlets and appliances. Different types of wiring are used for various purposes, and knowing the basic differences can help you identify potential issues. For example, older homes might have outdated aluminum wiring, which poses a higher risk of overheating compared to modern copper wiring.

Identifying and Fixing Common Electrical Problems

Identifying and fixing common electrical problems can prevent bigger issues and keep your home safe. Below are some common issues and how to solve them:

1. Flickering Lights: Flickering lights often indicate a loose connection or a faulty bulb. First, check if the bulb is screwed in tightly. If the issue persists, the problem might be in the switch or wiring. Turn off the power and inspect the connections to ensure they’re secure.

2. Tripping Circuit Breakers: If your circuit breaker trips frequently, it might be due to an overloaded circuit or a short circuit. Identify which appliances are on the circuit and try unplugging some to reduce the load. If the breaker continues to trip, it could indicate a more serious wiring issue that requires professional attention.

3. Faulty Outlets: Dead outlets or those that spark when plugging in devices can be dangerous. First, ensure the circuit breaker hasn’t tripped. If the outlet remains dead, turn off the power and inspect the wiring for any loose connections. Replace any damaged outlets or consult with an electrician if you’re unsure.

4. Light Switches Not Working: If a light switch isn’t working, it could be due to a worn-out switch or a problem with the wiring. Turn off the power and remove the switch plate to inspect the connections. Replace the switch if it looks damaged or worn.

By addressing these common problems, you can maintain a safer home environment. Always remember to follow safety precautions when working with electricity, and don’t hesitate to seek professional help for complex issues.

Safety Tips for DIY Electrical Repairs

When tackling electrical repairs yourself, safety should be your top priority. Electricity can be extremely dangerous if not handled correctly, so following safety guidelines is essential to prevent injury and damage.

1. Turn Off the Power: Always turn off the power at the circuit breaker before starting any electrical work. Double-check the power is off by using a voltage tester on the circuit you’ll be working on.

2. Use Proper Tools: Ensure you have the right tools for the job. Insulated tools are designed to reduce the risk of electrical shock and are essential for any DIY electrical project.

3. Wear Protective Gear: Wear rubber-soled shoes and safety glasses to protect yourself from electric shocks and flying debris. Avoid working in wet or damp conditions, as water is a good conductor of electricity.

4. Follow Wiring Standards: Stick to standard color codes for wiring (black or red for hot wires, white for neutral, and green or bare for ground). Incorrect wiring can lead to dangerous situations.

5. Consult Manuals and Guides: Use reputable sources when researching how to do specific repairs. Instruction manuals, online tutorials, and guides from trusted organizations can provide valuable information.

Following these safety tips helps minimize the risk when performing electrical repairs. If you feel unsure about any aspect of the repair, it’s best to consult with a professional to ensure your safety and compliance with local electrical codes.

When to Call a Professional Electrician

Knowing when to call a professional electrician can save you from dangerous situations and costly mistakes. While some minor electrical repairs can be done by a knowledgeable homeowner, other issues require the expertise of a licensed electrician.

1. Frequent Circuit Breaker Trips: If your circuit breaker trips often, even after reducing the load on the circuit, it might indicate a more severe electrical issue. Professional electricians are trained to diagnose and fix such problems.

2. Sparking or Hot Outlets: Outlets that spark or feel hot to the touch are serious concerns. These symptoms indicate potential wiring issues that could lead to electrical fires. Contact an electrician immediately if you notice these signs.

3. Flickering Lights in Multiple Areas: If lights flicker in different parts of your home, it may suggest a problem with the main electrical panel or wiring. A professional electrician can inspect and repair these systems safely.

4. Burning Smell or Scorch Marks: If you detect a burning smell or see scorch marks around outlets or switches, this signifies an urgent problem. Turn off the power to the affected area and call an electrician right away.

5. Complex Installations: Tasks such as adding new circuits, upgrading the electrical panel, or installing complex lighting require professional skills and knowledge. Attempting these jobs without proper training can be dangerous.

By recognizing when professional help is needed, you ensure that electrical repairs are done safely and correctly. Trusting a licensed electrician for complex or dangerous repairs protects your home and your family.

Conclusion

Maintaining your home’s electrical system is key to ensuring a safe and functional living environment. From understanding the basics of your electrical system to identifying and fixing common problems, taking these steps can prevent minor issues from becoming major headaches. Always prioritize safety when dealing with electrical repairs and know when it’s time to call in a professional.

By following these guidelines, you can make informed decisions about handling electrical issues in your home. Whether you’re fixing a simple problem or tackling a more complicated repair, being knowledgeable and cautious can make all the difference.

For those times when you need expert assistance, Turner On Electric is here to help. Our team of experienced electricians in Milford is dedicated to providing reliable and safe electrical services. Contact us today to schedule an appointment and ensure your home’s electrical system is in top shape.

What to Do When Your Circuit Breaker Keeps Tripping

circuit breaker

Dealing with a circuit breaker that keeps tripping can be both frustrating and concerning. A circuit breaker is designed to protect your home by cutting the flow of electricity when there is a problem, such as an overload or a short circuit. Though it’s a crucial safety feature, frequent trips can disrupt your daily routine and signal deeper electrical issues that need addressing.

Identify Common Causes of Circuit Breaker Tripping

Understanding why your circuit breaker keeps tripping can help you fix the problem quickly. Here are some common causes:

1. Overloaded Circuit: This happens when too many devices are plugged into a single circuit, drawing more power than the circuit can handle. When this happens, the breaker trips to prevent overheating and potential fire hazards.

2. Short Circuit: A short circuit occurs when a hot wire comes into contact with a neutral wire. This can cause an overload of current, which can heat up and potentially cause a fire. This is a more serious problem that usually requires immediate attention.

3. Ground Fault: A ground fault happens when a hot wire touches a ground wire or the side of a metal outlet box. This causes a surge of electricity to flow into the ground, triggering the breaker to trip.

4. Faulty Appliances: Sometimes, the issue isn’t with the circuit itself but with the appliances connected to it. Faulty or worn-out appliances can draw excessive current and cause the breaker to trip.

Identifying the root cause is essential for implementing an effective solution. By understanding what causes your circuit breaker to trip, you can take the necessary steps to fix it and maintain a safe electrical environment in your home.

Troubleshooting Steps to Address Frequent Tripping

If your circuit breaker keeps tripping, follow these troubleshooting steps to identify and fix the issue:

1. Check the Load: First, unplug all devices on the affected circuit. Reset the breaker and see if it trips again. If it doesn’t, the problem might be an overloaded circuit. Redistribute the load by plugging some devices into different outlets.

2. Inspect Cables and Wires: Look for any visible damage to the cables and wires connected to the circuit. Damaged or frayed wires could indicate a short circuit or ground fault. If you find damaged wires, replace them immediately and reset the breaker.

3. Test Appliances: Plug in each appliance one at a time and observe whether the breaker trips again. This can help pinpoint a faulty appliance. If an appliance causes the breaker to trip, discontinue its use and consider repairing or replacing it.

4. Examine Outlets and Switches: Check all outlets and switches on the circuit for signs of damage or wear. Loose outlets can cause a breaker to trip. Tighten any loose connections and replace damaged outlets or switches.

5. Use a Multimeter: If you’re comfortable doing so, use a multimeter to check the voltage and current flow on the circuit. This can help identify if there’s an underlying electrical issue that requires professional attention.

By following these troubleshooting steps, you can often identify the root cause of frequent breaker tripping and take steps to resolve it, keeping your home safe and your electrical system functioning properly.

Safety Precautions to Follow When Handling Breakers

Handling circuit breakers requires caution to ensure safety. Here are some important safety precautions to follow:

1. Turn Off All Appliances: Before resetting a tripped breaker, unplug all appliances on the circuit. This helps prevent potential surges and further tripping when the breaker is turned back on.

2. Wear Protective Gear: Always wear protective gear like rubber-soled shoes and insulated gloves when working with electrical components. This reduces the risk of electrical shocks and injuries.

3. Use Proper Tools: Use insulated tools specifically designed for electrical work. Regular tools can conduct electricity and pose a risk of shock.

4. Avoid Water: Make sure your hands are dry and the area around the breaker is free from moisture. Water is a conductor of electricity and can cause serious injuries or even be fatal.

5. Stand on an Insulated Surface: When working with circuit breakers, stand on an insulated surface like a rubber mat to prevent the possibility of electric shock through grounding.

6. Do Not Touch Metal Parts: Avoid touching any metal parts inside the breaker panel. Metal conducts electricity and can lead to serious injuries.

Following these safety precautions ensures that you handle circuit breakers responsibly and minimizes the risk of accidents and injuries.

When to Call a Professional Electrician

Sometimes, the tripping issue is too complicated for a DIY fix, and it’s best to call a professional electrician. Here are scenarios when you should seek professional help:

1. Persistent Tripping: If your circuit breaker continues to trip despite your troubleshooting efforts, it could indicate a deeper electrical issue that requires professional expertise.

2. Burning Smell or Sparks: If you notice a burning smell or see sparks coming from the breaker panel, turn off the main power immediately and call an electrician. This is a serious hazard that needs prompt attention.

3. Electrical Shocks: If you experience electrical shocks when plugging in appliances or touching switches, it’s a sign of a severe electrical problem that should be inspected by a professional right away.

4. Old Electrical System: Homes with old electrical systems might not be equipped to handle modern electrical loads. An electrician can assess and update your system to meet current safety standards.

5. Frequent Power Outages: If you experience frequent power outages in addition to breaker trips, there might be an underlying issue with your electrical wiring or panel that requires professional diagnosis and repair.

Calling a professional electrician ensures that the job is done safely and correctly. Don’t hesitate to seek expert help when dealing with complex electrical issues.

Conclusion

Dealing with a circuit breaker that keeps tripping can be annoying, but it’s essential to address the issue to keep your home safe. Identifying the common causes and taking initial troubleshooting steps can often resolve the problem. Always follow safety precautions when handling electrical components to prevent accidents. However, some situations call for professional intervention. Persistent tripping, burning smells, electrical shocks, and old electrical systems are best handled by an experienced electrician.

Taking the right steps to resolve circuit breaker issues not only keeps your home safe but also ensures your electrical system runs smoothly. If you’ve tried troubleshooting and the problem persists, it’s time to call in the experts.

For reliable and professional electrical services, trust Turner On Electric. Our experienced electricians are ready to help you with all your electrical needs, ensuring your home remains safe and efficient. Contact our electrician in Bethel today for expert electrical services.